Building with Redpanda Connect: Bloblang and Claude plugin
A workshop on building and debugging real-world streaming pipelines
Learn how to track and visualize machine temperature data from IoT sensors in just six steps


Real-time equipment monitoring is vital in industries like manufacturing and power generation, where changes in machine performance can significantly impact operations. Companies can use IoT sensors to stream and analyze high-velocity data in real time while tracking metrics like temperature, vibration, and pressure.
For example, a manufacturing plant could track the temperature of its machines and detect early signs of overheating, allowing the maintenance team to fix issues before a breakdown occurs. Real-time monitoring can improve operational efficiency by providing instant visibility into machine performance and enabling proactive responses to changing conditions. It also enhances compliance and safety by ensuring machines operate within safe parameters, reducing equipment damage and workplace hazards.
In this tutorial, you’ll build a real-time equipment monitoring pipeline to track and visualize machine temperature data using MQTT, Redpanda, and Snowflake.
Imagine you’re working for a manufacturing company that operates three factories (Riverton, Ironvale, and Mechburg) with heavy machinery. Each factory is monitoring a CNC machine (CNC), a hydraulic press (HYD), and a welding robot (WLD). These machines generate a lot of heat, and overheating can lead to failures, downtime, and costly repairs.
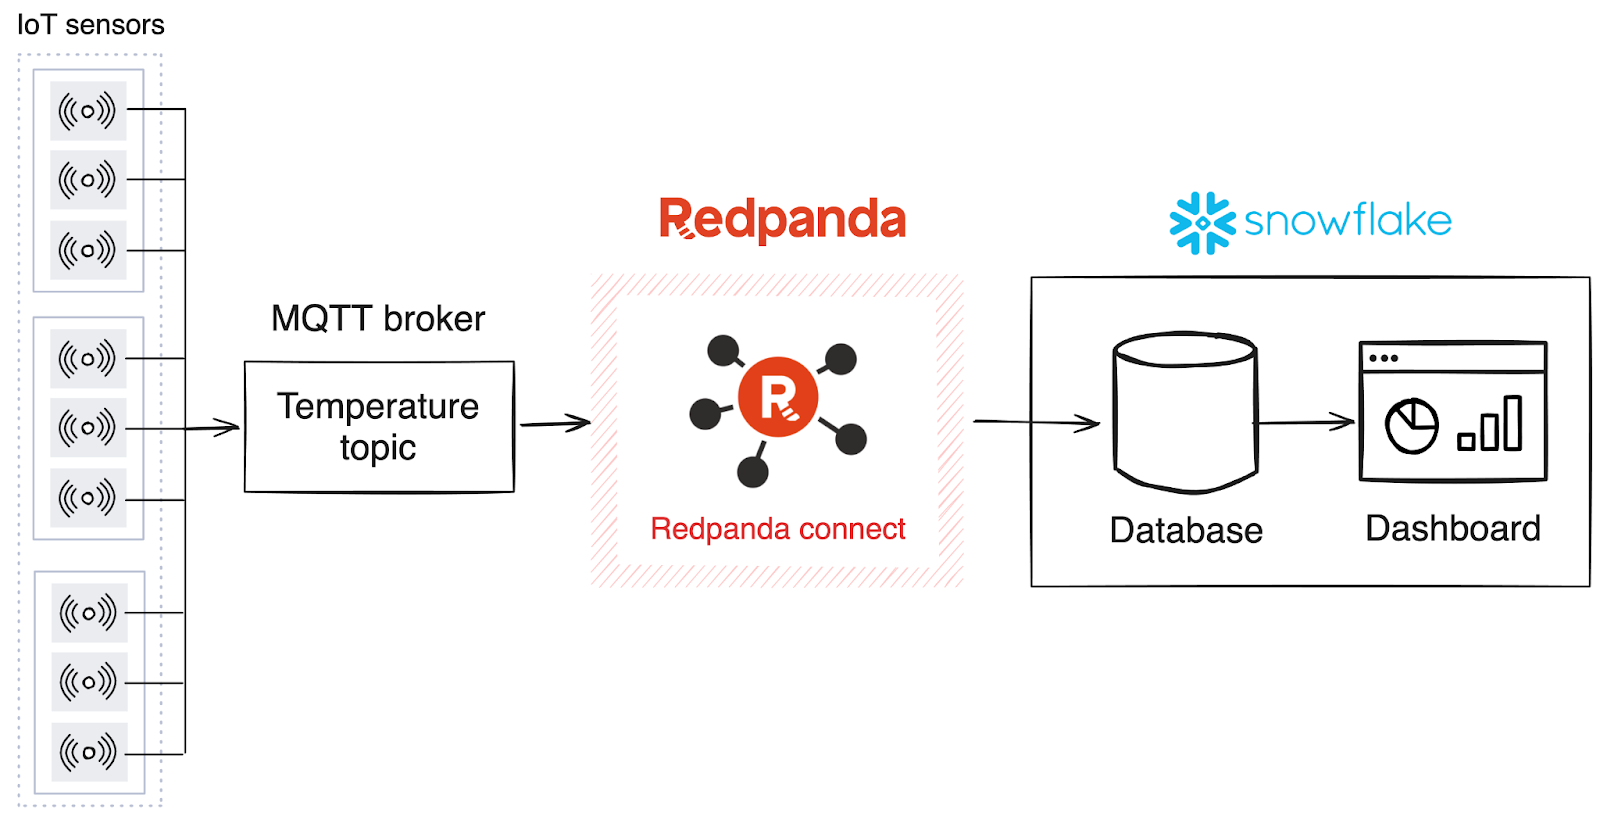
Your mission — should you choose to accept it — is to build a real-time monitoring system that tracks temperature data from IoT sensors attached to the machines. To build the solution, you have the following technologies:
In this system, the MQTT broker receives data from the equipment sensors. Redpanda uses Redpanda Connect to ingest data from the MQTT broker and sinks it into Snowflake, where it’s then stored in a database and visualized in a dashboard using charts.
You’ll need the following to complete this tutorial:
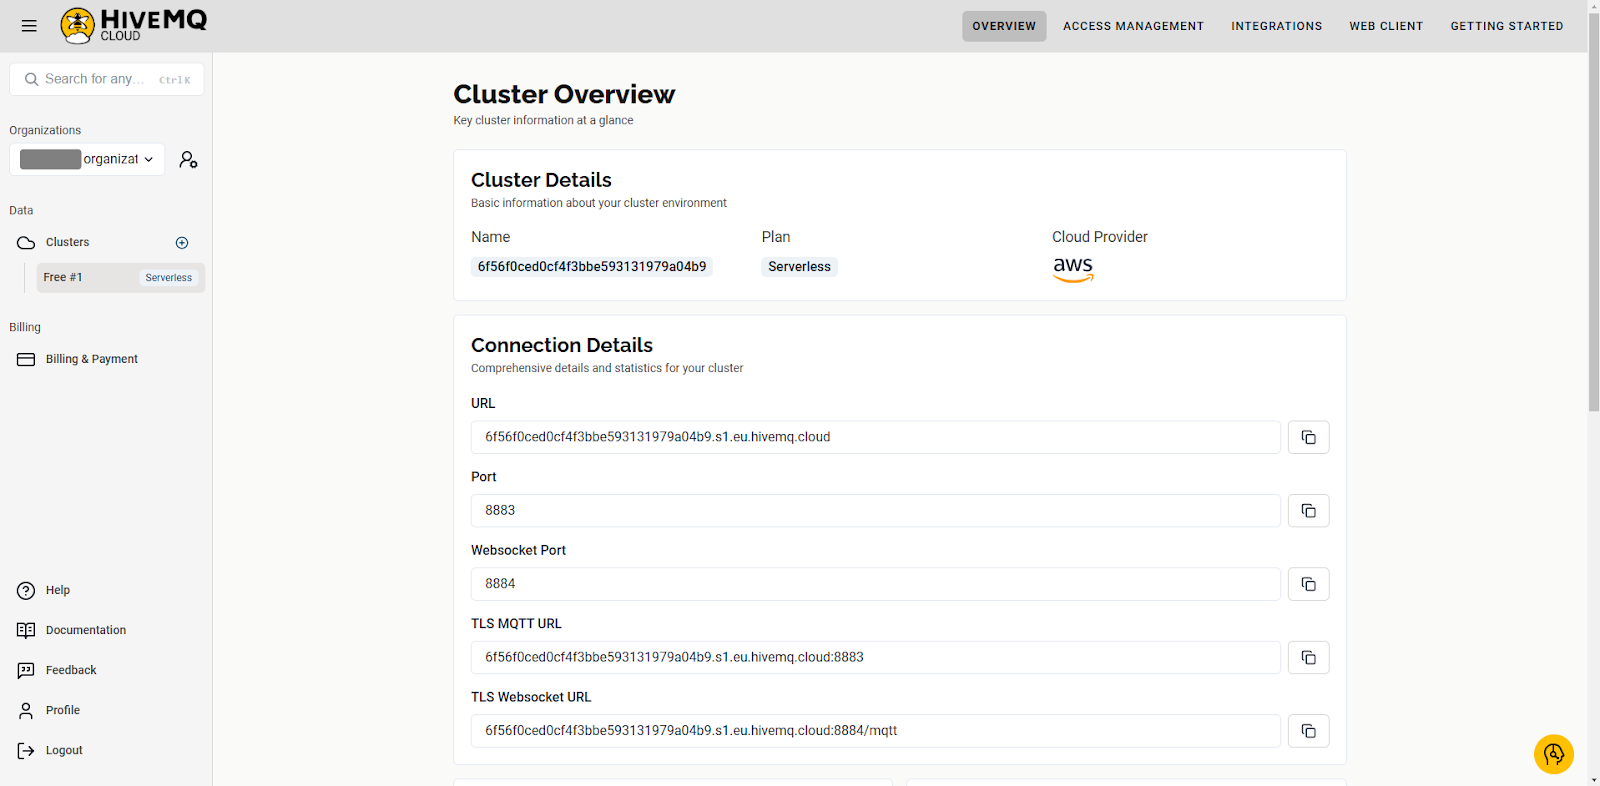
You’ll use HiveMQ as the MQTT broker. After signing up, you’ll need to create a new cluster. Choose the free serverless option and click Create Serverless Cluster:

After creating the cluster, navigate to the Overview page and take note of the URL and port number:
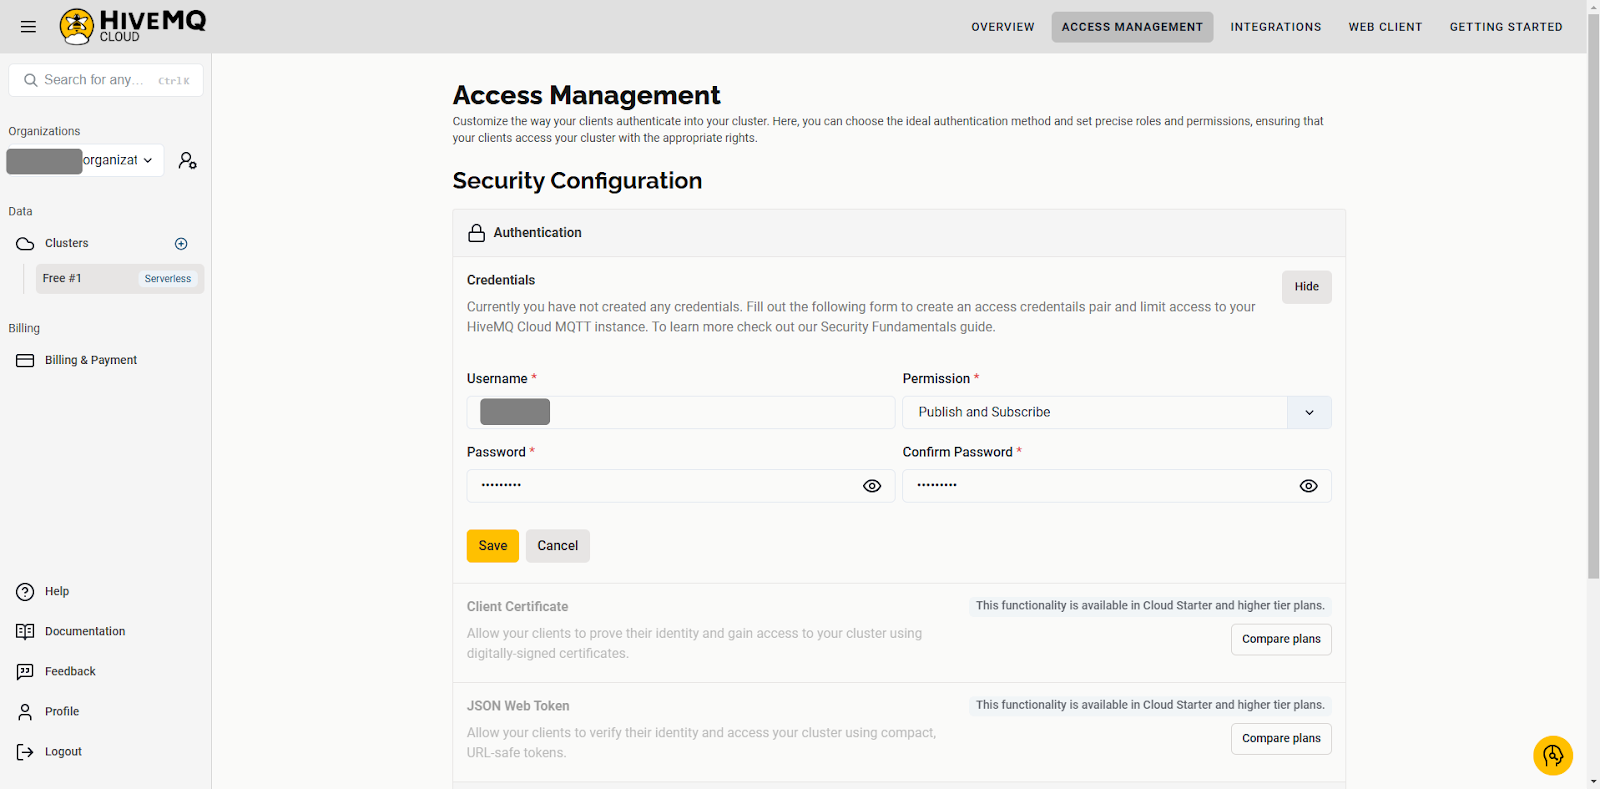
Navigate to the Access Management tab and create new credentials by clicking Edit, then Add Credentials. In the Permission drop-down menu, select Publish and Subscribe, then click Save.
In Snowflake, you’ll create the required resources and the credentials needed for a secure connection.
You need an SQL worksheet to execute the commands to create the resources. Navigate to Projects > Worksheets and create a new SQL worksheet:

Run the following SQL script in the worksheet to create a user, database, and role, which will be used to stream data from Redpanda Connect:
USE ROLE ACCOUNTADMIN;

-- Create a user
CREATE USER IF NOT EXISTS IDENTIFIER('MAINTENANCE_USER') PASSWORD='Maint1234567';

-- Create a role
CREATE OR REPLACE ROLE IDENTIFIER('REDPANDA_CONNECT');

-- Create a database and a warehouse
CREATE DATABASE IF NOT EXISTS IDENTIFIER('FACTORY_DB');
USE IDENTIFIER('FACTORY_DB');
CREATE OR REPLACE WAREHOUSE IDENTIFIER('FACTORY_WH') WITH WAREHOUSE_SIZE = 'SMALL';

-- Grant the role the privilege to create new warehouses
GRANT CREATE WAREHOUSE ON ACCOUNT TO ROLE IDENTIFIER('REDPANDA_CONNECT');
-- Grant the user the REDPANDA_CONNECT role
GRANT ROLE IDENTIFIER('REDPANDA_CONNECT') TO USER IDENTIFIER('MAINTENANCE_USER');
-- Transfer ownership of the database to the user
GRANT OWNERSHIP ON DATABASE IDENTIFIER('FACTORY_DB') TO ROLE IDENTIFIER('REDPANDA_CONNECT');
-- Grant the REDPANDA_CONNECT role usage permission to the FACTORY_WH warehouse
GRANT USAGE ON WAREHOUSE IDENTIFIER('FACTORY_WH') TO ROLE IDENTIFIER('REDPANDA_CONNECT');

-- Set the default role for MAINTENANCE_USER to REDPANDA_CONNECT
ALTER USER IDENTIFIER('MAINTENANCE_USER') SET DEFAULT_ROLE='REDPANDA_CONNECT';
-- Set the default warehouse for MAINTENANCE_USER to FACTORY_WH
ALTER USER IDENTIFIER('MAINTENANCE_USER') SET DEFAULT_WAREHOUSE='FACTORY_WH';
Run the following script to get the account identifier:
WITH HOSTLIST AS
(SELECT * FROM TABLE(FLATTEN(INPUT => PARSE_JSON(SYSTEM$allowlist()))))
SELECT REPLACE(VALUE:host,'.snowflakecomputing.com','') AS ACCOUNT_IDENTIFIER
FROM HOSTLIST
WHERE VALUE:type = 'SNOWFLAKE_DEPLOYMENT_REGIONLESS';
Take note of this value, as you’ll need it later.
You also need to create key-pair credentials for Snowflake authentication. Instead of a basic authentication mechanism (such as username and password), Snowflake uses key-pair authentication for enhanced security.
If you’re on Windows, you’ll need to install OpenSSL. Download the OpenSSL executable and choose the installer recommended for developers.
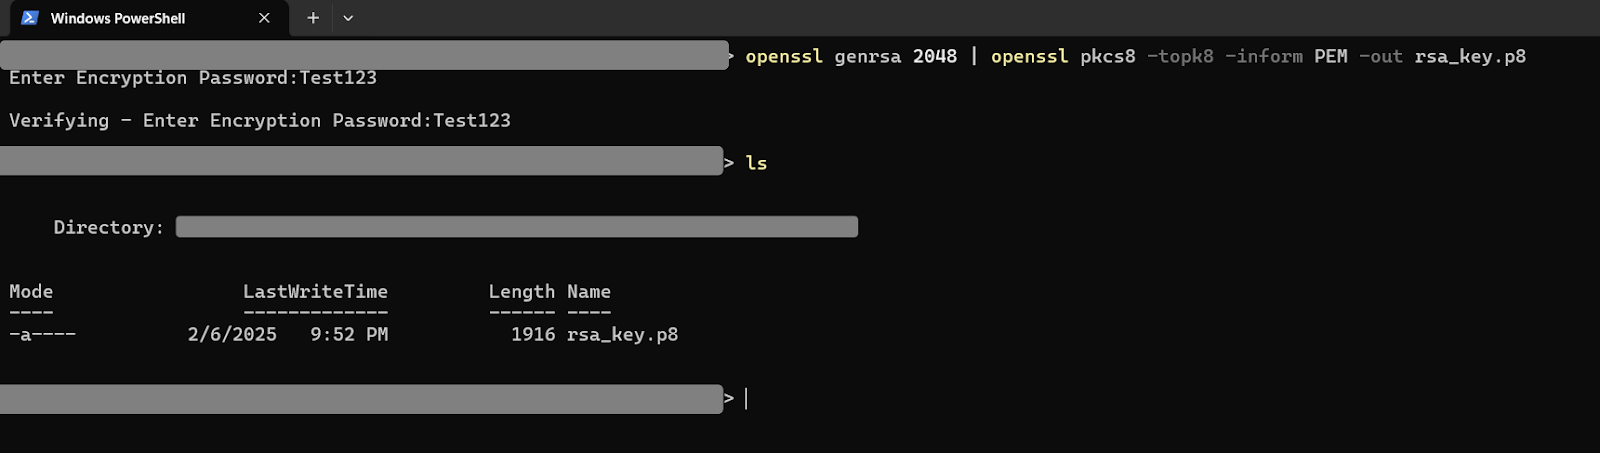
Open a terminal and navigate to the directory where you want to save the keys, then run the following command to generate a private key:
openssl genrsa 2048 | openssl pkcs8 -topk8 -inform PEM -out rsa_key.p8You’ll be asked to enter an encryption password. Take note of the password, as you’ll need it in the next step.
Now generate a public key with the following command and enter the encryption password when prompted:
openssl rsa -in rsa_key.p8 -pubout -out rsa_key.pub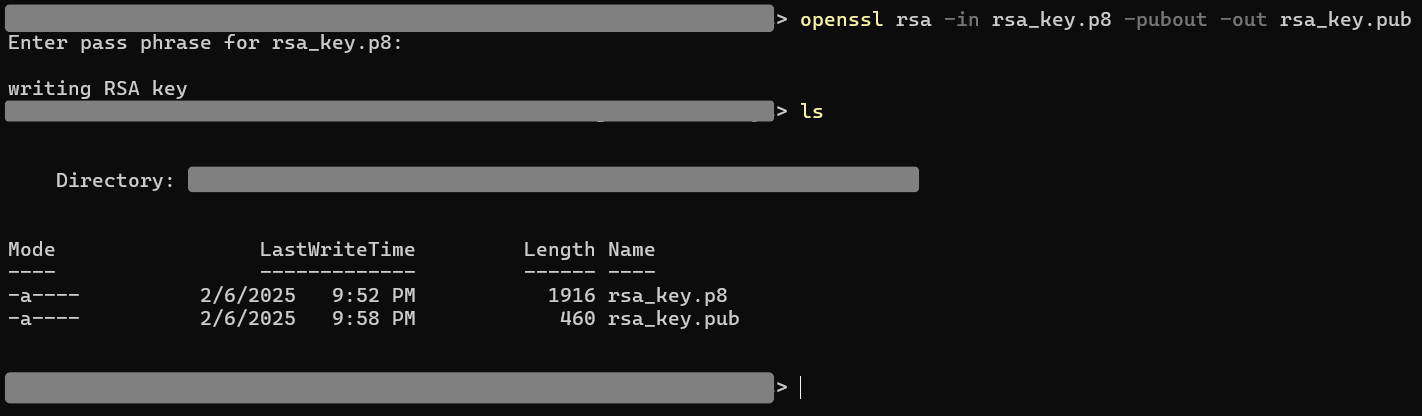
The public key has to be assigned to the Snowflake user. Run the following commands to extract the public key from rsa_key.pub without the delimiters:
# Read the contents of the public key file
$key = Get-Content rsa_key.pub

# Remove the first and last lines
$key = $key[1..($key.Length - 2)]

# Join the remaining lines into a single string without newlines
$key = $key -join ''

# Output the result
$key
Run the following SQL command in the SQL worksheet to assign the key to the user:
ALTER USER MAINTENANCE_USER SET RSA_PUBLIC_KEY="<pub_key>";To complete the database setup, you must create the database schema. Log out of Snowflake and log back in using the MAINTENANCE_USER credentials. Open a worksheet and run the following commands to create a new schema for the database:
USE IDENTIFIER('FACTORY_DB');
CREATE OR REPLACE SCHEMA IDENTIFIER('FACTORY_SCHEMA');To ingest and forward data in Redpanda, you need a cluster and a Redpanda Connect pipeline that configures the sink and source connectors. Start by creating a cluster. In Redpanda, navigate to the Clusters page and click Create cluster:

Locate Serverless Standard and click Create:
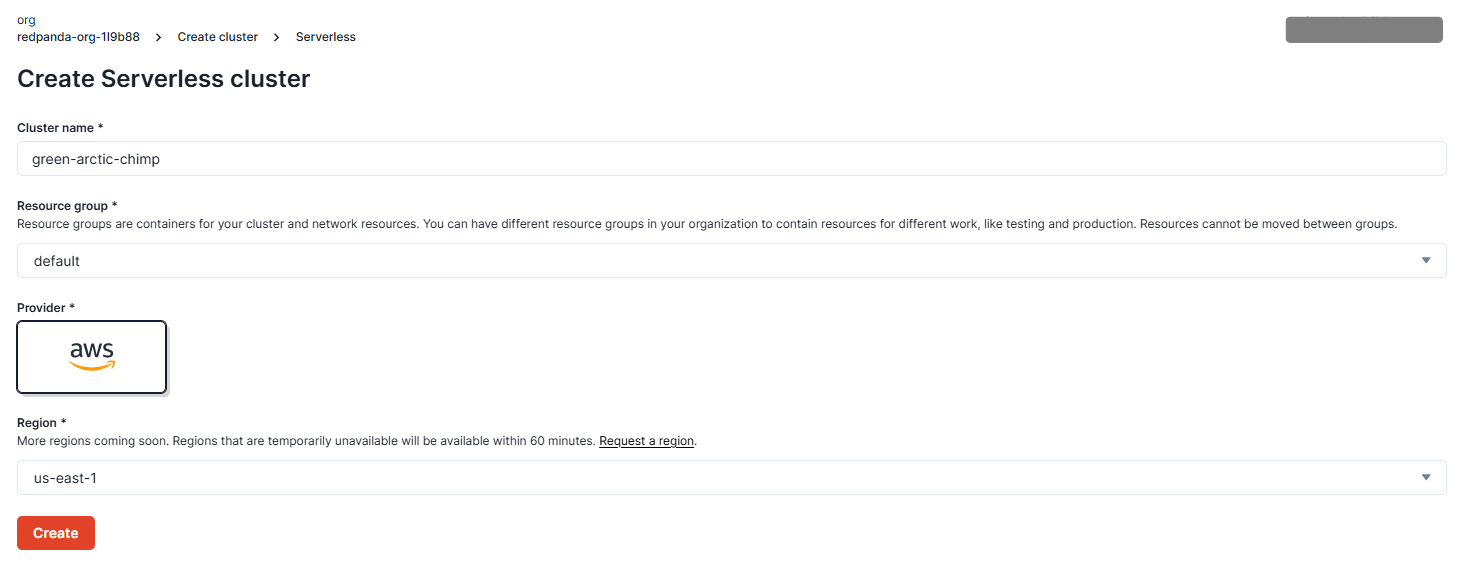
Click Create to create a new cluster using the provided defaults.
Next, you’ll create the pipeline. Start by configuring the secrets you need for the pipeline. Navigate to the Connect page in the cluster, then click the Secrets tab:
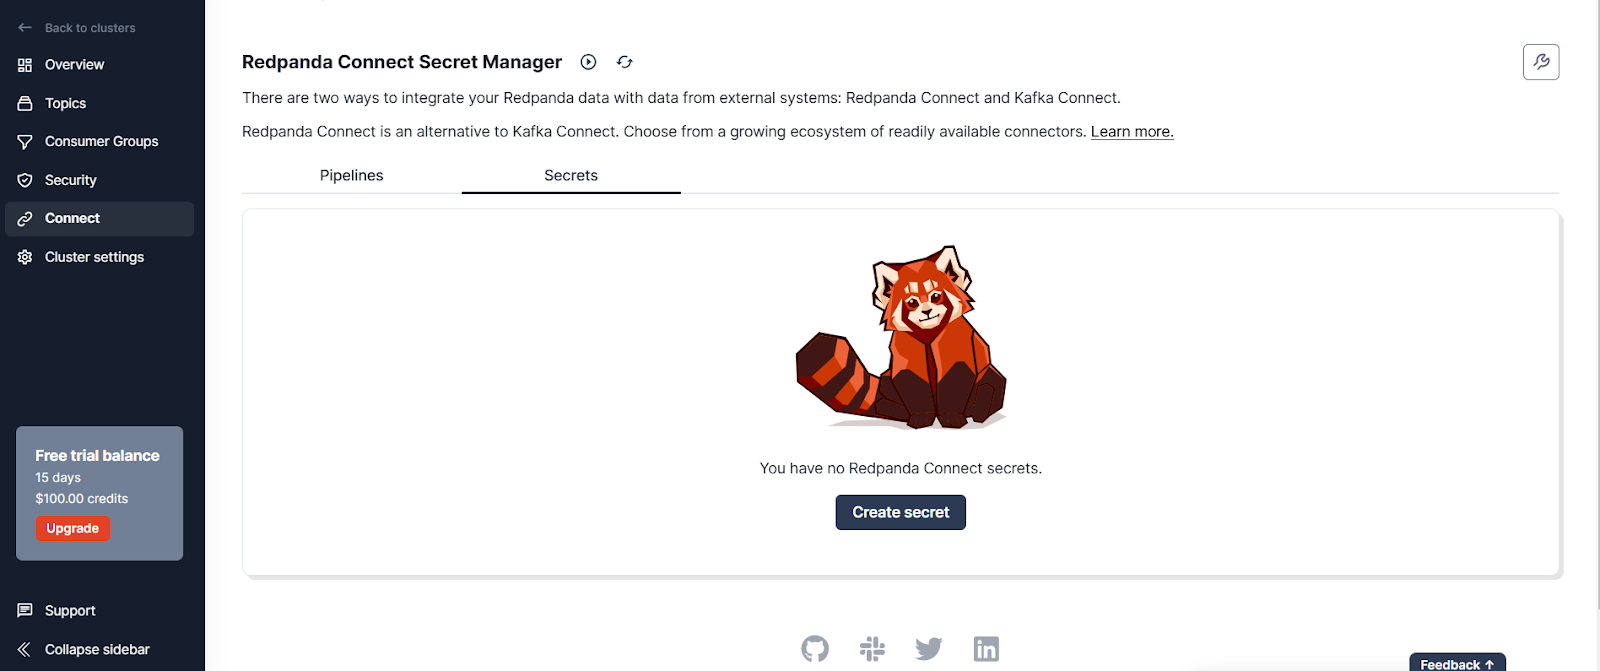
Click Create secret and add a secret called SNOWFLAKE_PRIVATE_KEY for the private key you generated. Create another one called SNOWFLAKE_PRIVATE_KEY_PASS for the encryption key.

You should now see the secrets in the Secrets tab:

Go to the Pipelines tab and create a new pipeline called “MQTT Temperature”:
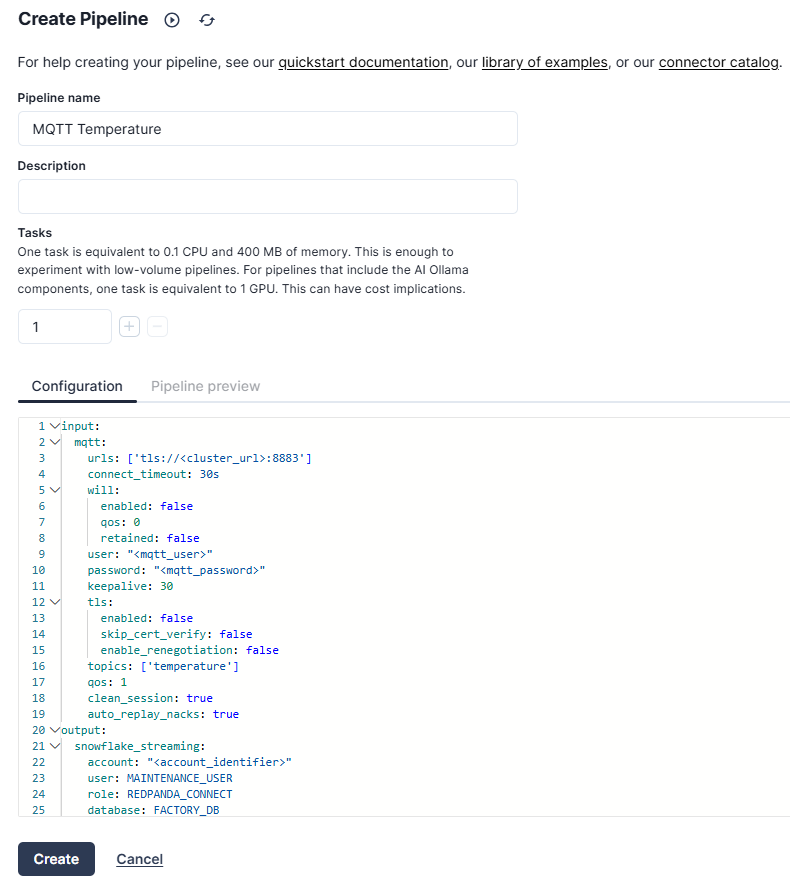
In the Configuration section, add the following:
input:
  mqtt:
    urls: ['tls://<cluster_url>:8883']
    connect_timeout: 30s
    will:
      enabled: false
      qos: 0
      retained: false
    user: "<mqtt_user>"
    password: "<mqtt_password>"
    keepalive: 30
    tls:
      enabled: false
      skip_cert_verify: false
      enable_renegotiation: false
    topics: ['temperature']
    qos: 1
    clean_session: true
    auto_replay_nacks: true
output:
  snowflake_streaming:
    account: "<account_identifier>"
    user: MAINTENANCE_USER
    role: REDPANDA_CONNECT
    database: FACTORY_DB
    schema: FACTORY_SCHEMA
    table: TEMPERATURE_READINGS
    private_key: "${secrets.SNOWFLAKE_PRIVATE_KEY}"
    private_key_pass: "${secrets.SNOWFLAKE_PRIVATE_KEY_PASS}"
    schema_evolution:
      enabled: true
    max_in_flight: 4
    batching:
      byte_size: 50_000_000
      period: 120s
This configuration defines a data pipeline in Redpanda Connect, where temperature readings from an MQTT broker are ingested and forwarded to a Snowflake database. The input section configures the MQTT connector to consume data from the MQTT broker. It requires the URL for the MQTT cluster and the authentication credentials.
The output section configures the Snowflake connector to forward the received MQTT temperature data to a Snowflake database. It requires details about the Snowflake account, user, database, and authentication keys.
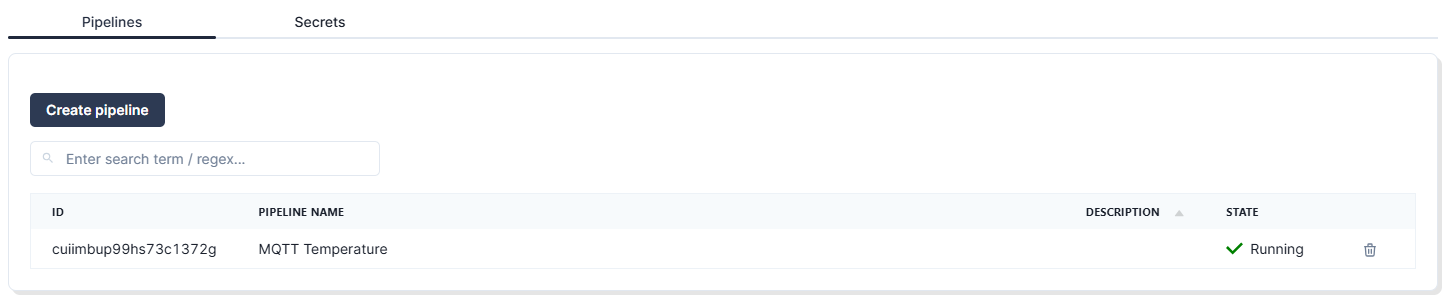
Once you’ve successfully configured the pipeline, it should be in the “Running” state:
At this point, your setup is ready to ingest data into Redpanda and forward the data to Snowflake. Now you just need to generate the data.
You won’t be using actual IoT sensors in this tutorial. Instead, you’ll emulate the temperature sensor data using a JavaScript package called MQTT.js. To get started with MQTT.js, clone this example repository into your workplace, preferably your home directory. To generate temperature data for the different factories for the demo, replace the code in example.js with the following:
const mqtt = require('mqtt');

const options = {
  username: '<username>',
  password: '<password>',
};

const client = mqtt.connect('tls://<cluster_url>:8883', options);

client.on('message', function(topic, message) {
  console.log(String.fromCharCode.apply(null, message));
});

client.on('connect', () => {
  console.log('Connected!');
});

client.on('error', (error) => {
  console.log('Error:', error);
});

client.subscribe('temperature');

function delay(ms) {
  return new Promise(resolve => setTimeout(resolve, ms));
}

function publish(factory, equipmentId) {
  let temperature = (Math.random() * (100 - 30) + 30).toFixed(2);
  let timestamp = new Date().toISOString();
  const message = `{"FACTORY":"${factory}","EQUIPMENT_ID":"${equipmentId}","TEMPERATURE":"${temperature}","TIMESTAMP":"${timestamp}"}`;
  client.publish('temperature', message);
}

async function publishMessages() {
  for (let i = 1; i <= 1000; i++) {
    await delay(1000);
    publish("Riverton", "RVT-CNC-001");
    publish("Riverton", "RVT-HYD-001");
    publish("Riverton", "RVT-WLD-001");
    publish("Ironvale", "IRV-CNC-001");
    publish("Ironvale", "IRV-HYD-001");
    publish("Ironvale", "IRV-WLD-001");
    publish("Mechburg", "MCB-CNC-001");
    publish("Mechburg", "MCB-HYD-001");
    publish("Mechburg", "MCB-WLD-001");
  }
}

publishMessages();
This code generates random temperature data for three machines in each factory every second and generates a timestamp for each record. The data is published to a topic called temperature.
In your terminal, navigate to where example.js is located and run it by using this command:
node example.jsRedpanda will consume this data and forward it to Snowflake, where you can create a dashboard to visualize it.
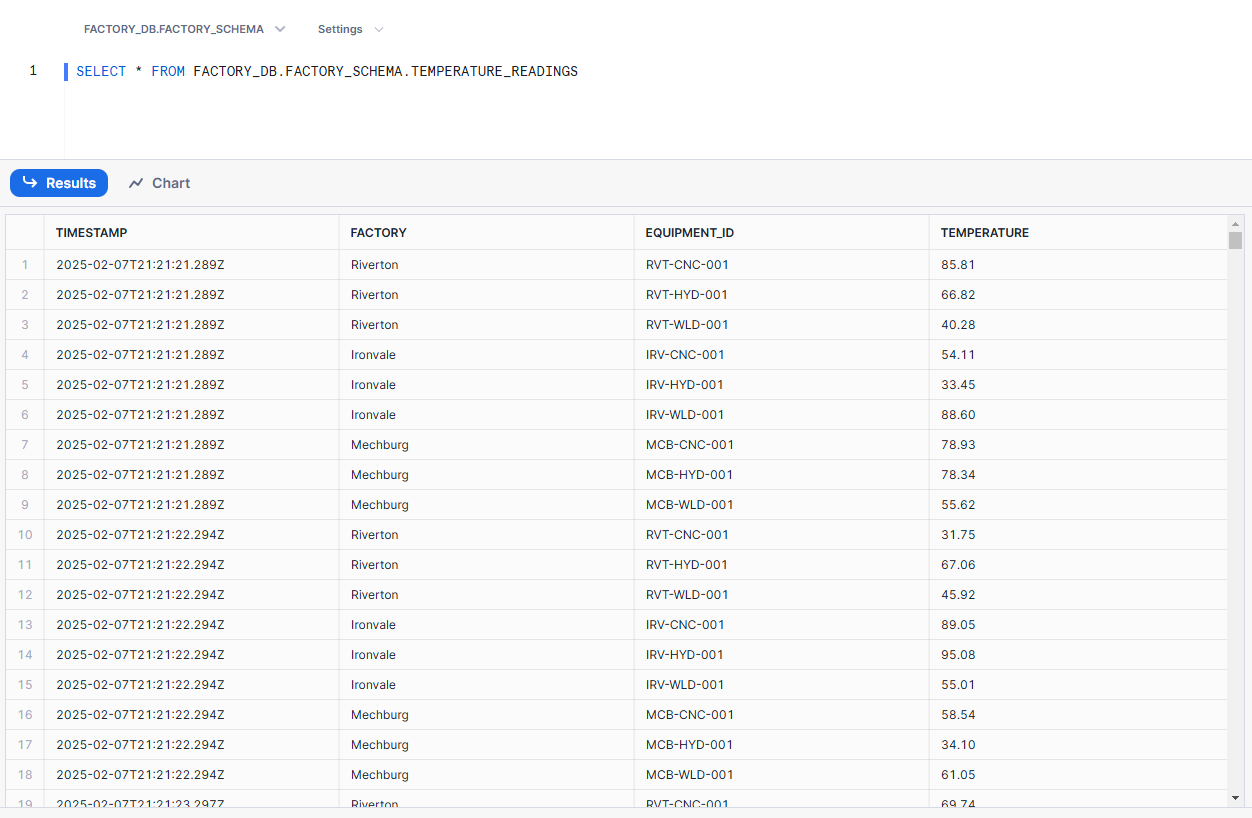
To visualize the data in Snowflake, you first need to open a worksheet and run this command:
SELECT * FROM FACTORY_DB.FACTORY_SCHEMA.TEMPERATURE_READINGSYou’ll see the data recorded in the table:
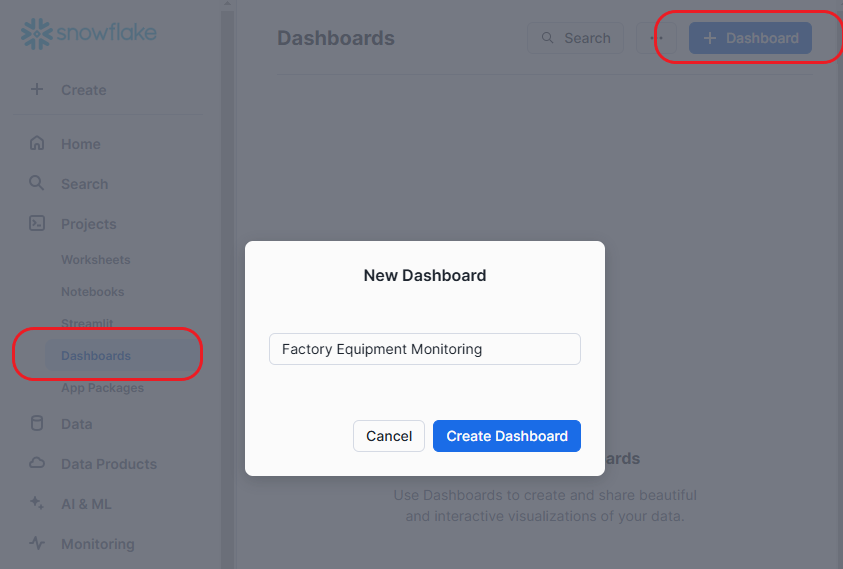
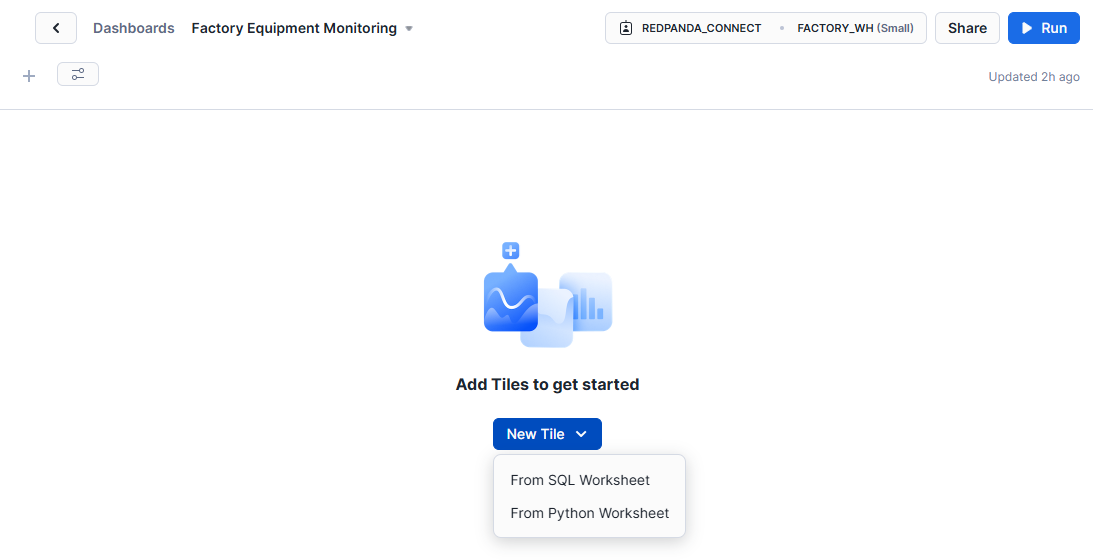
You can visualize this data by creating a customizable dashboard in Snowflake. Navigate to Projects > Dashboards. Create a new dashboard by clicking + Dashboard, and name it “Factory Equipment Monitoring”:
After creating the dashboard, locate the warehouse selection control and choose FACTORY_WH under the REDPANDA_CONNECT role:

Click New Tile and select From SQL Worksheet. This is where you’ll query the data that you want to display.
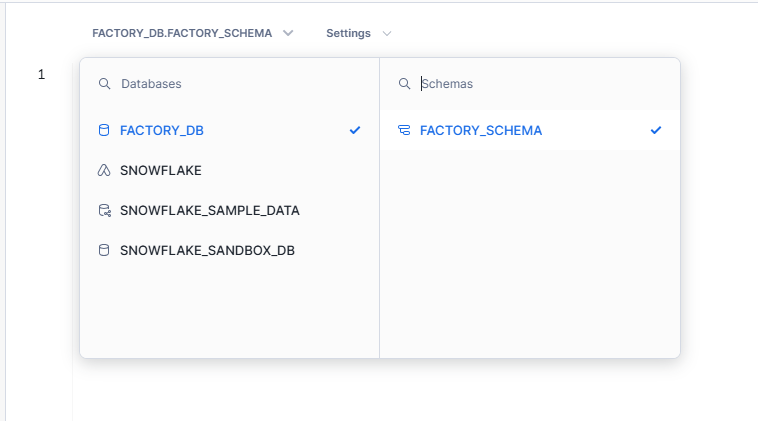
In the tile modal, select the FACTORY_DB database and the FACTORY_SCHEMA schema.
In the SQL worksheet, run the following query:
SELECT * FROM FACTORY_DB.FACTORY_SCHEMA.TEMPERATURE_READINGS
WHERE FACTORY = 'Riverton' AND EQUIPMENT_ID = 'RVT-CNC-001'
LIMIT 100;
This should return the first 100 temperature readings for the CNC machine in the Riverton factory. Click Chart to visualize the data:
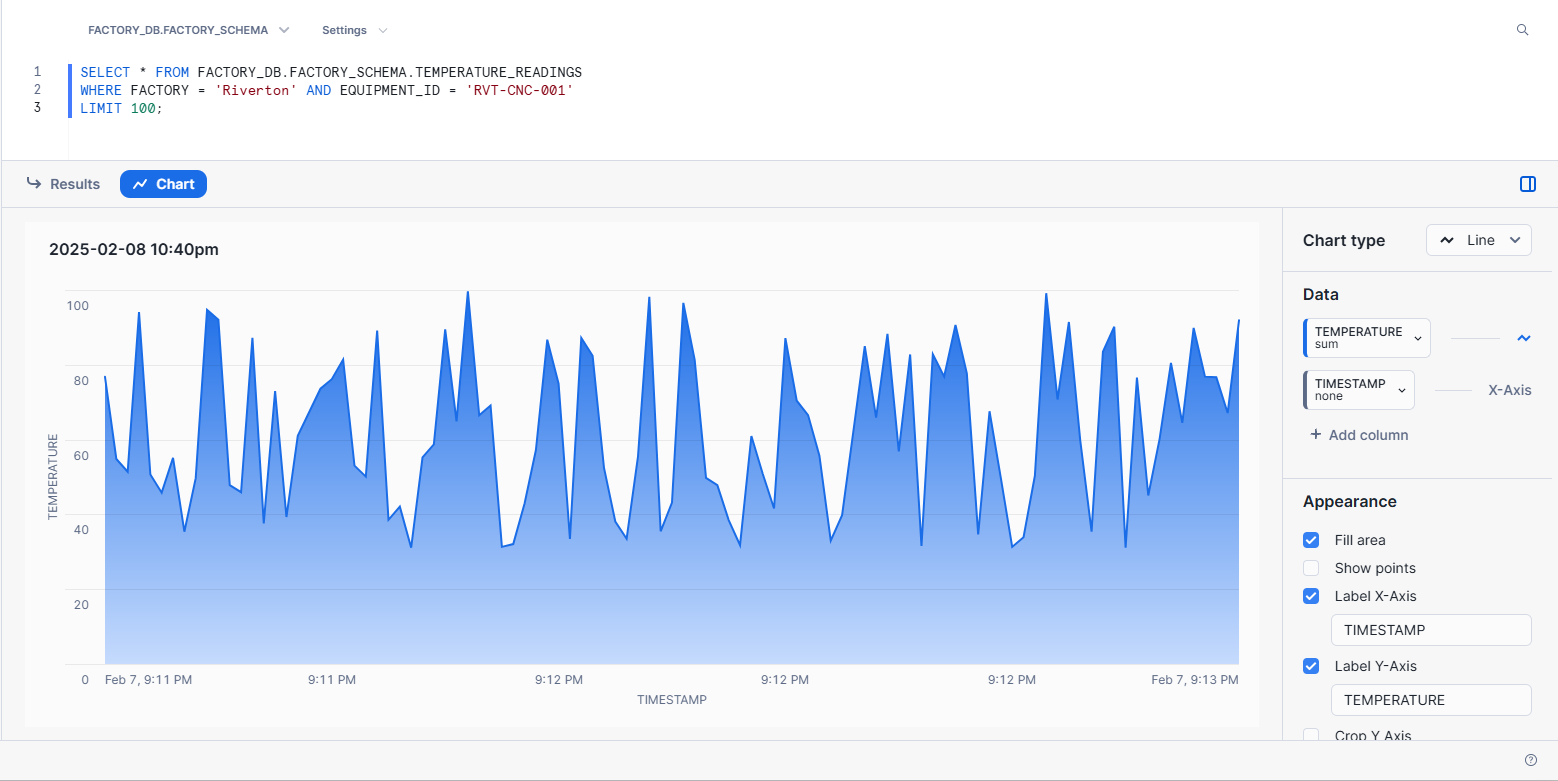
If your chart doesn’t look like the image above, locate the chart editor on the right. In the Chart type section, set the chart type to Line. In the Data section, set TEMPERATURE to Line and TIMESTAMP to X-Axis. In the Appearance section, check the options Fill area, Label X-Axis, and Label Y-Axis.

You now have a visual representation of the temperature data based on the SQL query.
Congratulations! You’ve successfully created an end-to-end, real-time equipment monitoring solution using MQTT, Redpanda Connect, and Snowflake. Look at you go.
Now that you’ve built a real-time equipment monitoring pipeline, you can use machine learning to extend its capabilities.
With Redpanda, you can launch streaming data pipelines for AI in minutes. Redpanda Connect offers a suite of GenAI processors to support building powerful and flexible AI data pipelines. With Redpanda Connect, you can create pipelines that can forward real-time data into ML platforms to perform machine learning analysis. This is crucial for use cases like prediction analysis, fraud detection, and real-time chat systems.
For example, your hypothetical manufacturing company can extend its solution to optimize its maintenance schedule. An ML model can be trained on historical failure data to analyze real-time temperature fluctuations and predict failures before they happen.
Redpanda Connect provides connectors to integrate with popular AI services. For real-time anomaly detection, you can use services such as Vertex AI, Amazon Bedrock, and TensorFlow. For complex decision-making, you can use vector-based services such as Pinecone and Qdrant. You can also use a natural language processing service (such as OpenAI) to create automated responses and generate failure reports. This makes Redpanda Connect a powerful tool for real-time, AI-driven decision-making.
To learn more about Redpanda Connect, check out how it compares to Kafka Connect. (Spoiler: it’s much simpler to use and way more efficient to run.)
Pat yourself on the back and break out the good coffee, because you learned how to build a real-time equipment monitoring pipeline in just six steps. You also learned how Redpanda pipelines can be extended by integrating ML models for predictive analysis. As a reminder, you can find the full code and implementation details in this GitHub repository.
If you haven’t already, sign up for Redpanda Serverless and start streaming data in seconds (for free)! Until the next tutorial.
Subscribe to our VIP (very important panda) mailing list to pounce on the latest blogs, surprise announcements, and community events!
Opt out anytime.