How OmniNode uses Redpanda to scale AI agent workflows
A case study in keeping Redpanda topic names from drifting with contracts
Speed wins. Deliver insights in an instant with Redpanda’s blazing-fast Snowflake Connector


To create a Redpanda topic on Redpanda Serverless, log in to Redpanda Cloud using your account details. On the landing page, click the name of your cluster for an overview, then click Topics in the side menu to view the list of topics in the cluster. Click Create topic to create one, enter the topic name, and accept the other default options by clicking Create.
To set up a real-time financial data streaming pipeline using Redpanda Serverless and Snowflake, you need to create a Redpanda topic to store the data coming from a producer application. Then, create a user and grant it permissions to interact with the cluster. You also need to set up your Snowflake account for streaming and set up Redpanda Connect secrets. Finally, you can create and deploy the Redpanda Connect pipeline.
To set up your Snowflake account for streaming, log in to Snowflake and click Query data on the landing page. This opens a SQL Worksheet, where you can enter the SQL command to create a database in Snowflake. You don't need to create a table manually as the Redpanda Connect pipeline you'll set up later will automatically create one for you. You also need to create and configure the key pair for your user account to access Snowflake programmatically or via Redpanda Connect.
Streaming financial data has several applications in modern financial institutions. These include real-time fraud detection, portfolio management for instantaneous insights into investment portfolios, and regulatory compliance through continuous monitoring for adherence to financial regulations.
The prerequisites for setting up a real-time financial data streaming pipeline using Redpanda Serverless and Snowflake include the Git client CLI for cloning the base project, Python 3.12 or above, a virtual environment for Python, a Redpanda Serverless free trial account and a Redpanda Serverless cluster ready to operate, and a Snowflake free trial account.
Redpanda Serverless and Snowflake offer an easy, no-code, configuration-driven approach to stream data from anywhere into Snowflake. Redpanda Connect, part of this tech stack, offers 2X faster writes compared to Kafka Connect, making it an efficient choice for real-time analytics.
Modern financial institutions rely on real-time data to power critical operations such as stock market tracking, portfolio management, and regulatory compliance. These functions demand immediate insights because financial markets are highly volatile, and even minor delays can result in missed opportunities or increased exposure to risk.
Portfolio managers, for instance, need up-to-the-second performance data to rebalance investments proactively, while compliance teams must monitor transactions as they happen to detect potential regulatory breaches before they escalate. As competition and regulatory scrutiny intensify, the ability to process and act on streaming financial data in real time has become essential for staying competitive and safeguarding operations.
The main applications of streaming financial data include:
This tutorial explains how to capture financial transactions, stream data to Snowflake, and analyze it. To make it happen, you’ll set up a real-time financial data streaming pipeline using Redpanda Serverless and Snowflake, using Redpanda Connect — which offers 2X faster writes compared to Kafka Connect.
Let’s get started.
Let’s paint a picture. Stockonline Corp. (not a real company) is a trading platform that manages vast amounts of stock market data, including real-time stock prices, trade volumes, and historical trends. It needs to process this data as fast as possible to remain competitive.
So, Stockonline Corp. chooses Redpanda and Snowflake as part of its real-time analytics tech stack since this duo offers the easiest, no-code configuration-driven approach to stream data from anywhere into Snowflake. In the following snippet of historical stock price data for the S&P 500 index (SPX), each record represents the closing price of the SPX on a specific date:
[
  {"Date":"2023-02-01","Ticker":"SPX","ClosingPriceUSD":4500.12},
  {"Date":"2023-02-02","Ticker":"SPX","ClosingPriceUSD":4523.78},
  {"Date":"2023-02-03","Ticker":"SPX","ClosingPriceUSD":4556.9},
…
]
In this snippet, the Date column represents the trading date. Ticker refers to the stock index (in this case, the S&P 500). ClosingPriceUSD denotes the stock price at the end of the trading day. As part of this tutorial, this stock price data will be fed to a Redpanda topic named stock_price with the help of a producer app written in Python.
The stock price data from this Redpanda topic will be continuously read by a connector defined using Redpanda Connect, which will ingest the data into a Snowflake table. Your analytics team can then use the stock price received in the Snowflake table for various business needs (beyond the scope of this tutorial).
The following diagram illustrates the architecture of this scenario:

You’ll need the following to complete this tutorial:
To enable streaming data use from Redpanda Serverless to Snowflake, you first need to create a topic in Redpanda to store the stock price data coming from a producer application.
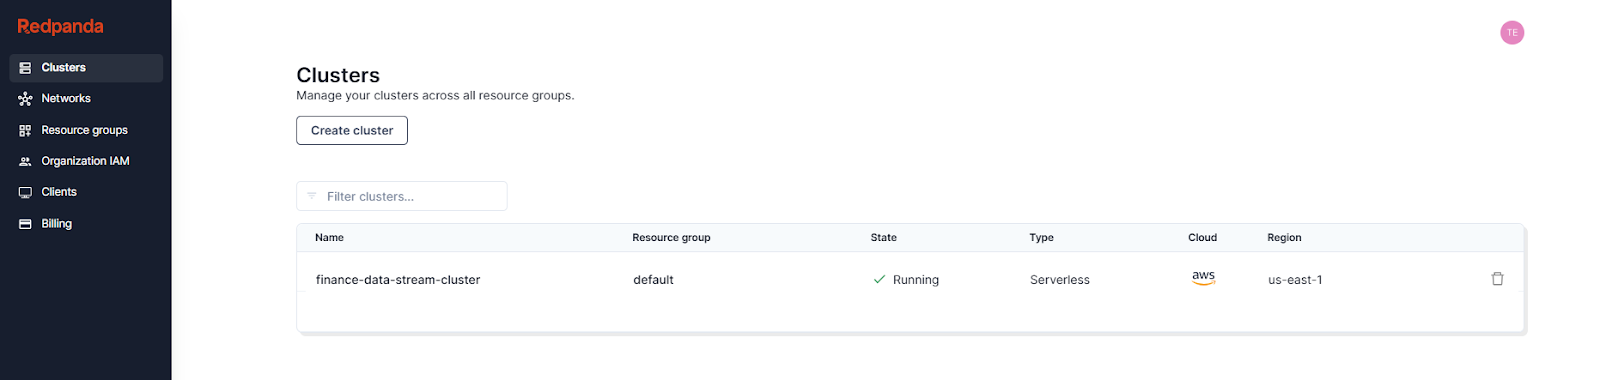
Log in to Redpanda Cloud using your account details. On the landing page, you should see the Redpanda cluster that you created as part of the prerequisites:
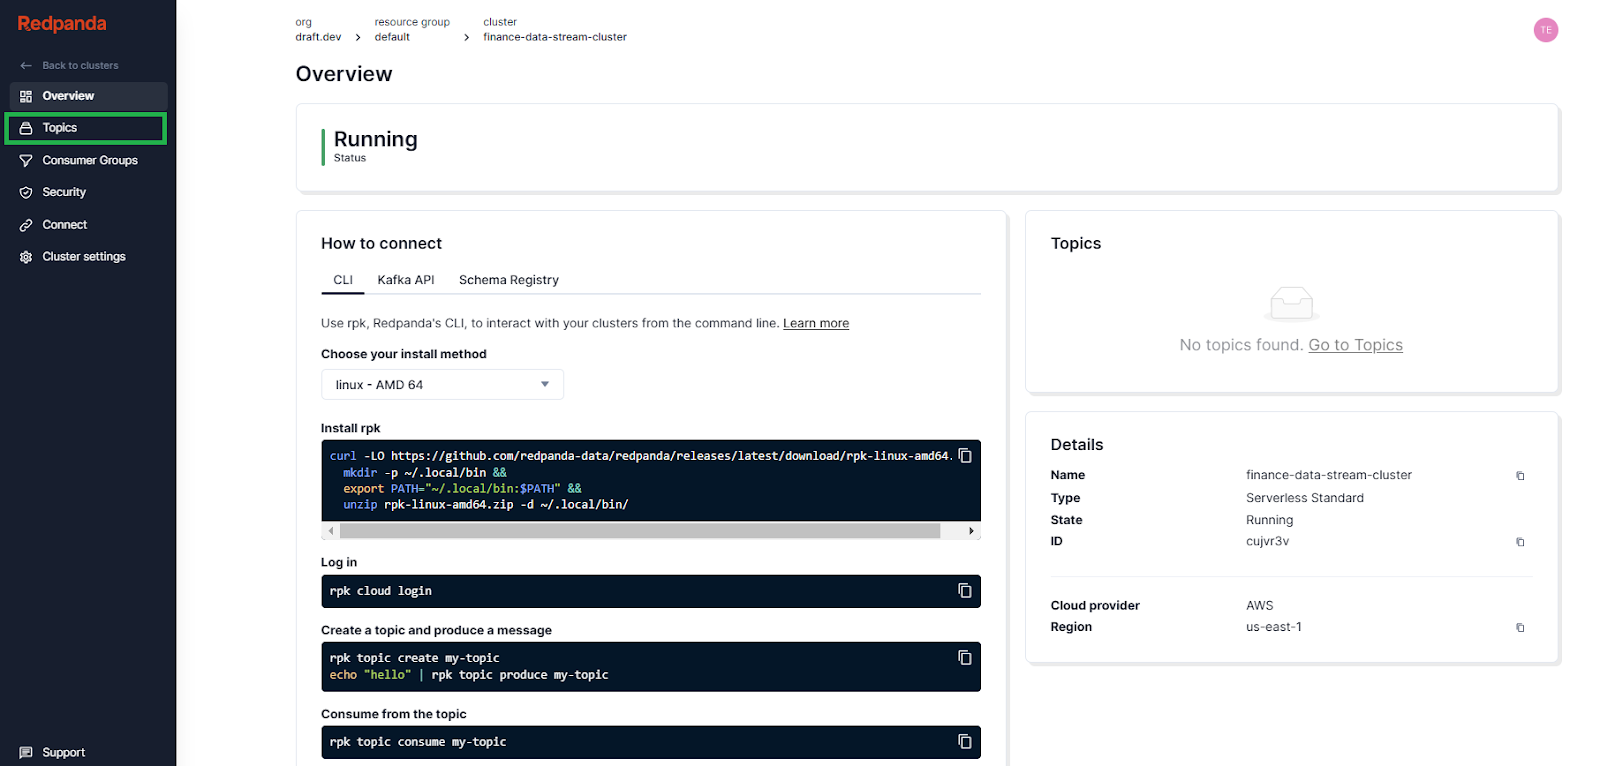
Click the name of your cluster for an overview, then click Topics in the side menu to view the list of topics in the cluster:
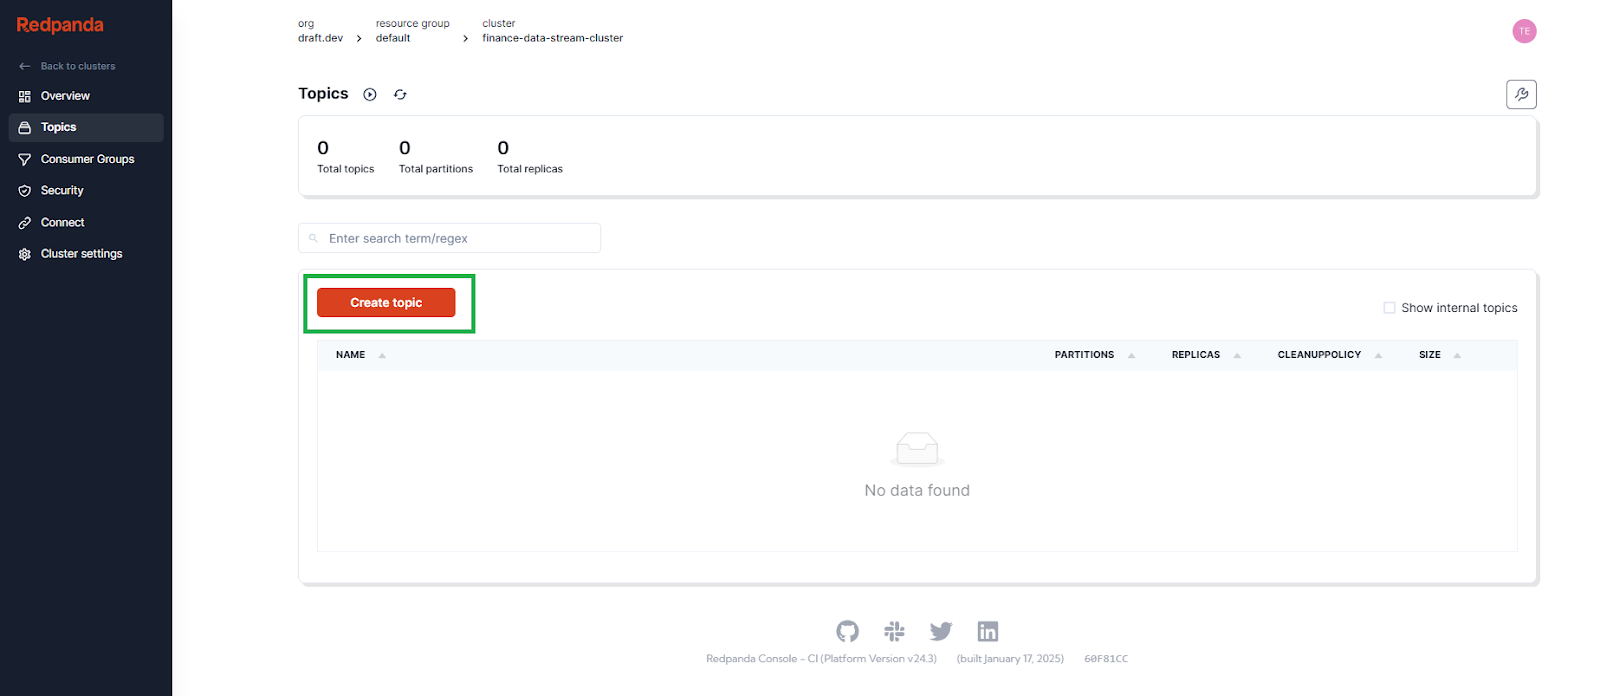
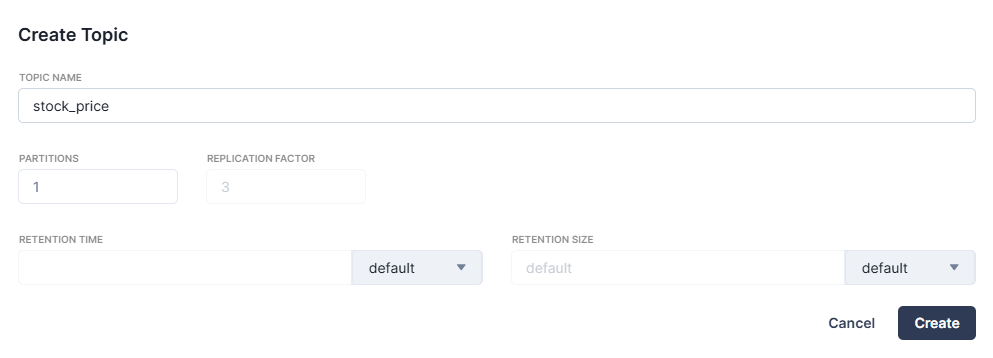
You shouldn’t see any topics at the moment. Click Create topic to create one:
Enter stock_price as the topic name and accept the other default options by clicking Create to create the topic:
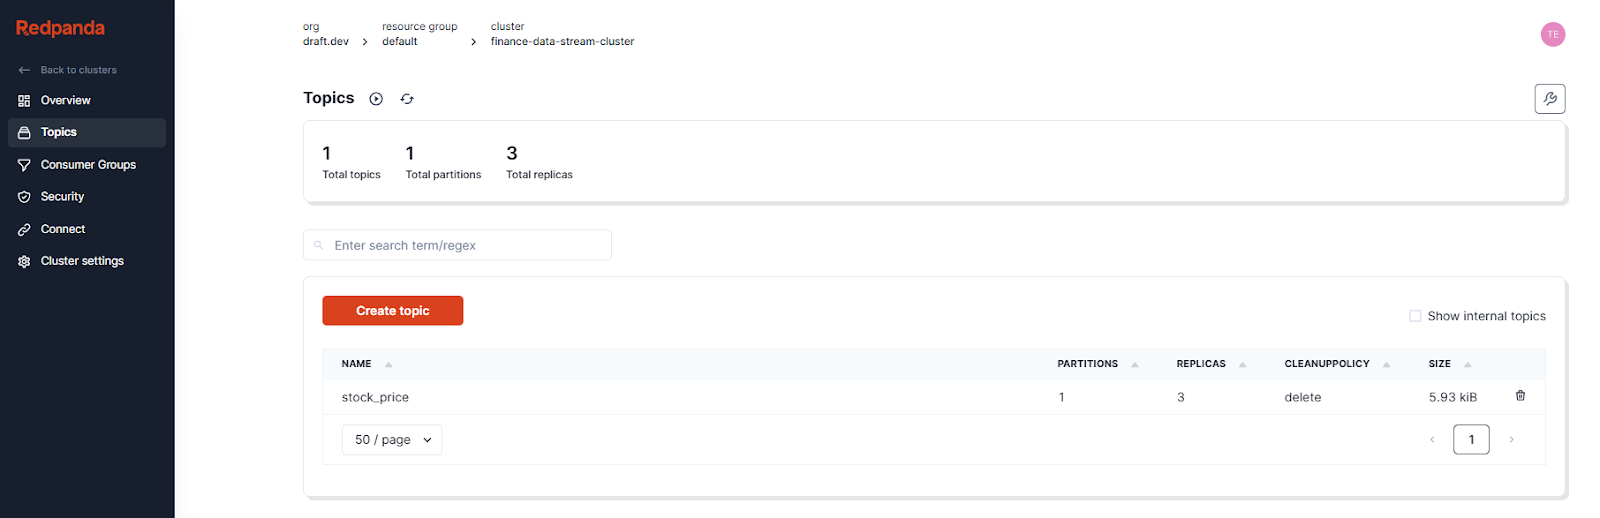
You can now see the created topic in the topics list:
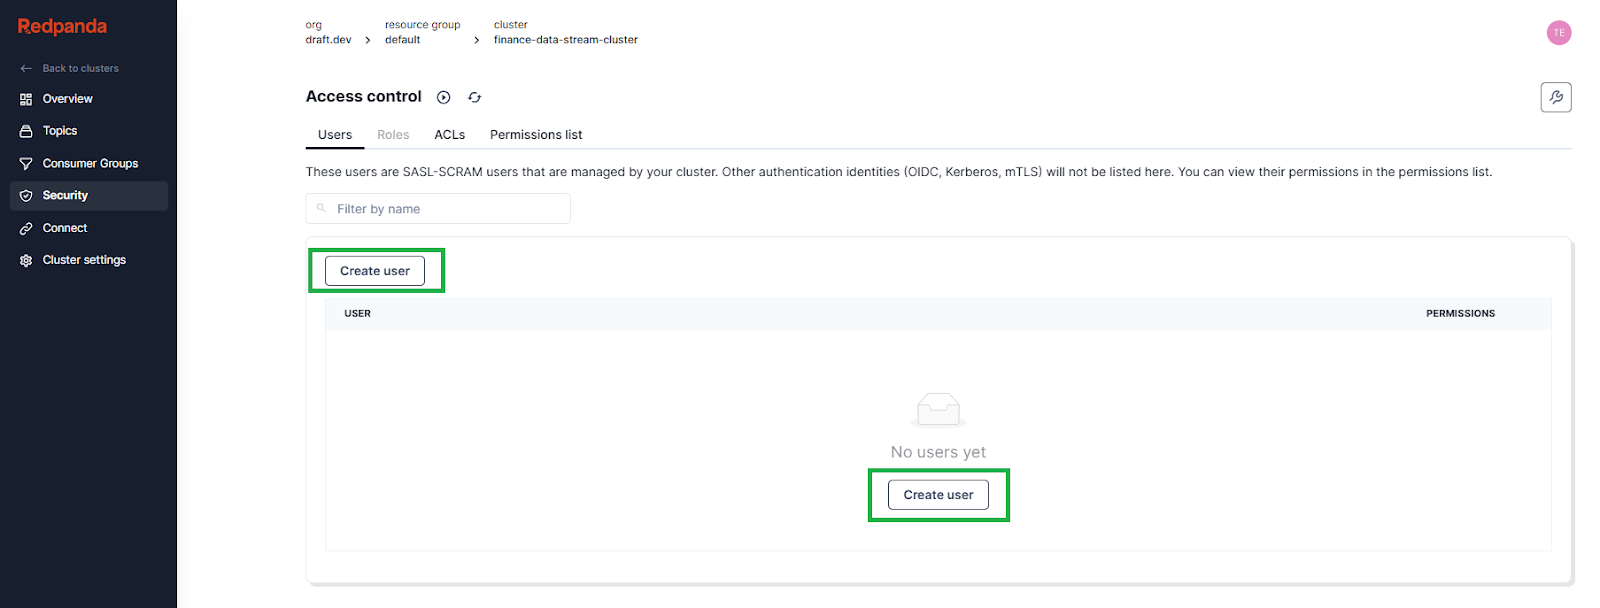
Redpanda Serverless clusters have Transport Layer Security (TLS) enabled by default to secure all communication between brokers. To read from and write to topics, you need to create a user and grant it permissions to interact with the cluster.
Click Security in the side menu to view the security access control screen, then click Create user:
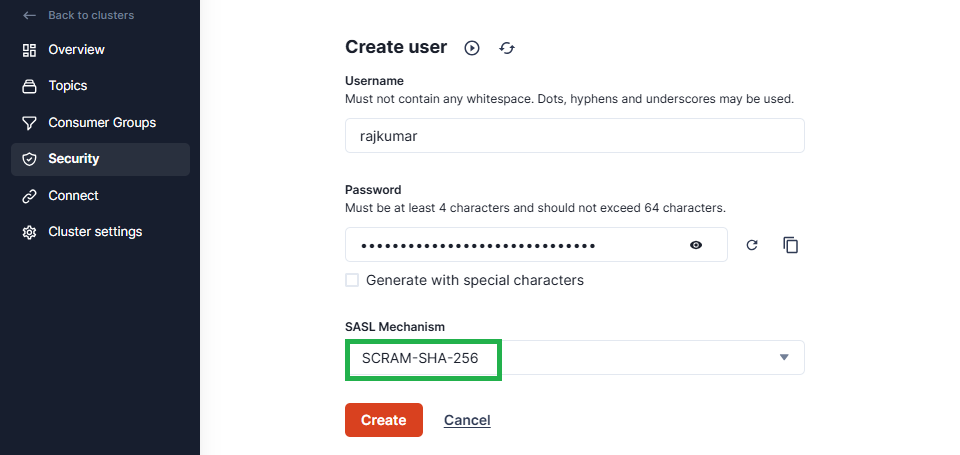
Fill in a username and password. For the purposes of this tutorial, choose SCRAM-SHA-256 for the SASL mechanism and click Create to create the user:
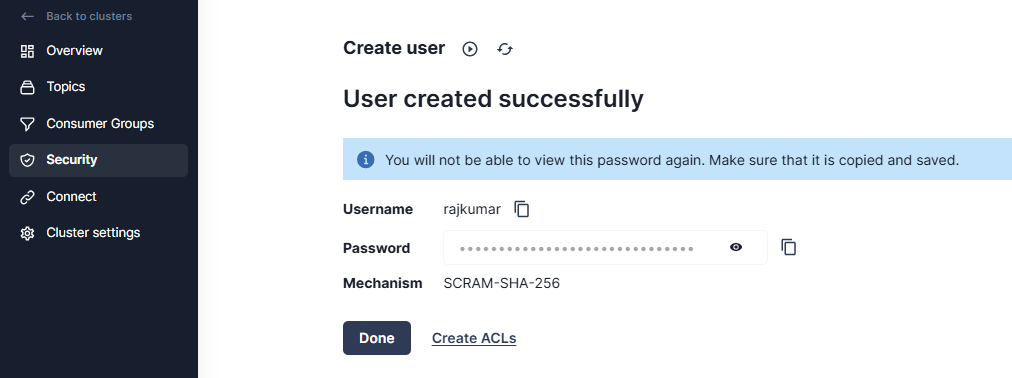
You’ll be automatically redirected to a screen confirming the user was created successfully. You can click the icons next to the user password to view it or copy it for later reference. Before navigating away, click the Create ACLs link to assign privileges to the user:
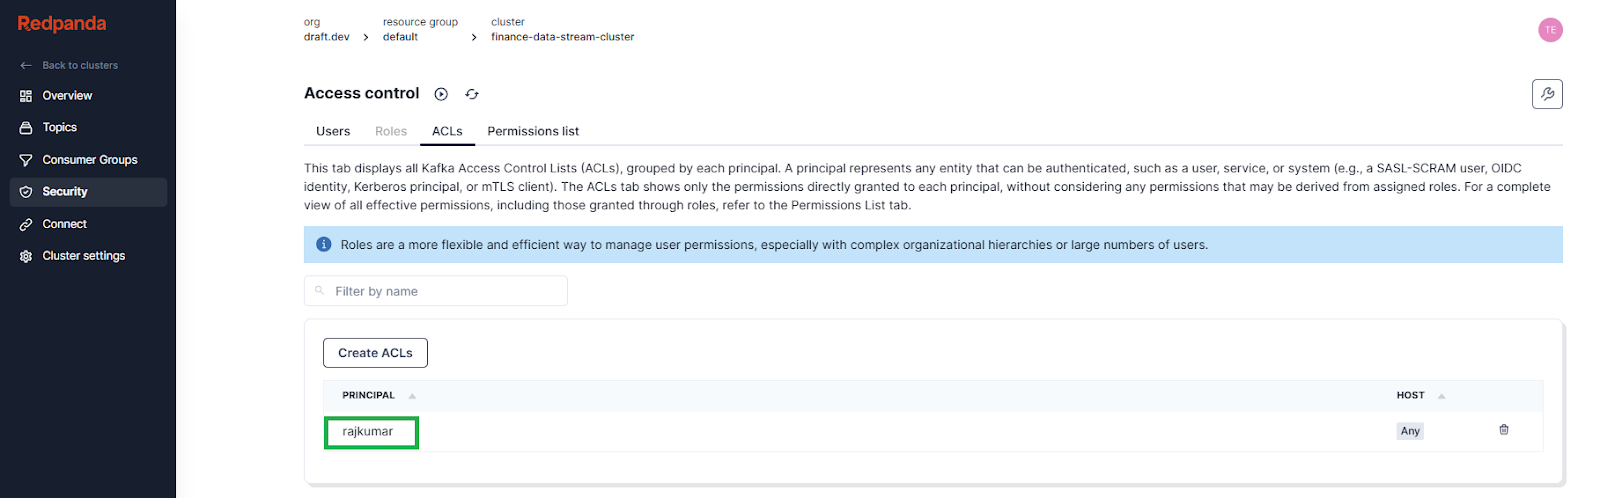
After the previous step, you should see a list of available ACLs. Double-click the ACL principal name (the username of the user you created):
On the next screen, click Allow all operations to grant all privileges for the user as part of this demo:
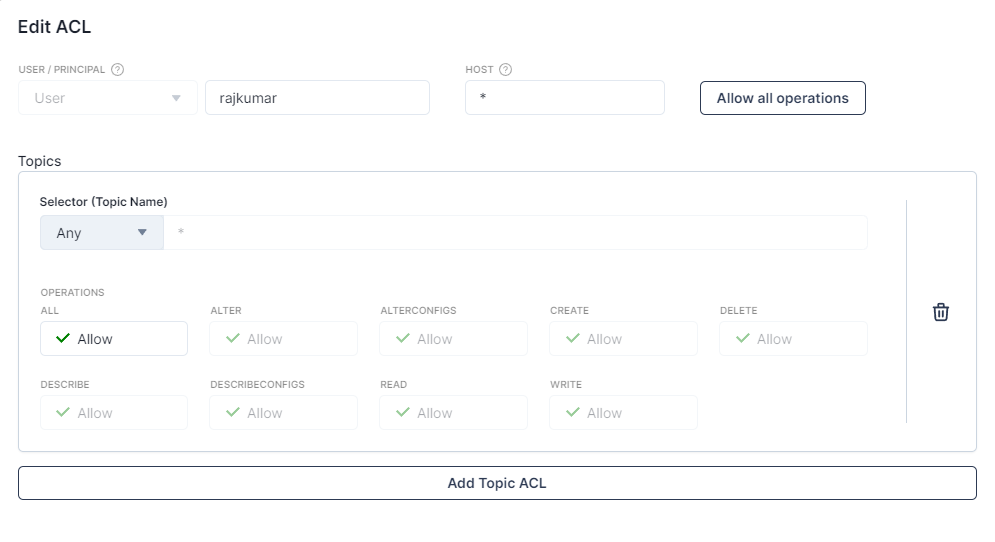
Then, scroll down to the bottom of the screen and click OK. You can now move on to setting up Snowflake.
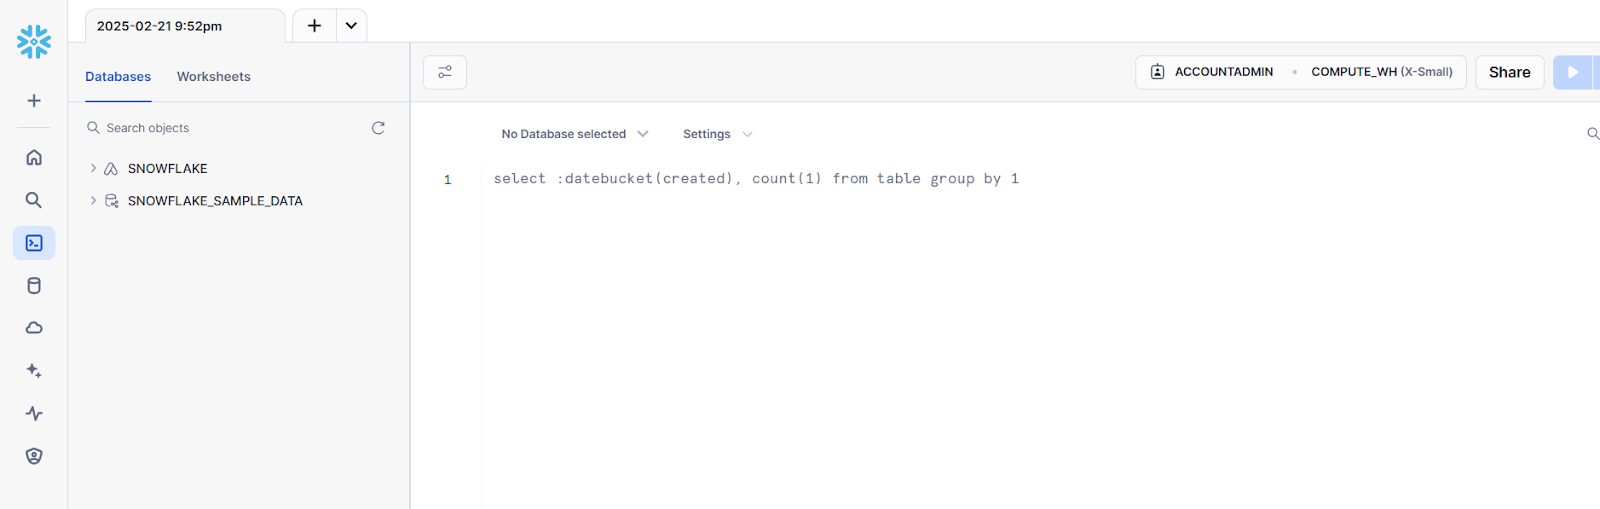
Log in to Snowflake, then click Query data on the landing page:

This opens a SQL Worksheet, where you can interact with the Snowflake database by executing commands or explore database objects via the user interface:
In the query editor pane, enter the SQL command create database TRADING_DATA; to create a database in Snowflake, then click the Execute button:
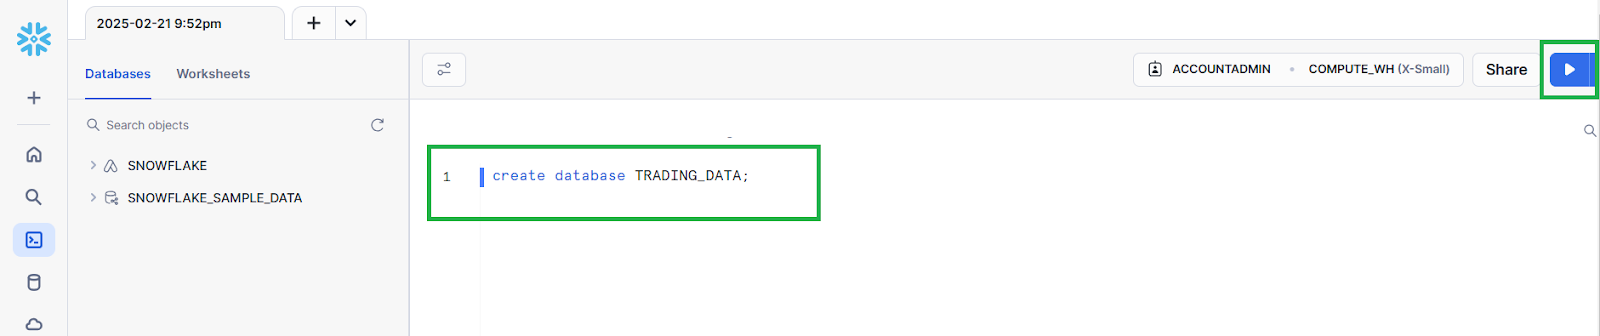
You don’t need to create a table manually. Happily enough, the Redpanda Connect pipeline you’ll set up later will automatically create one for you.
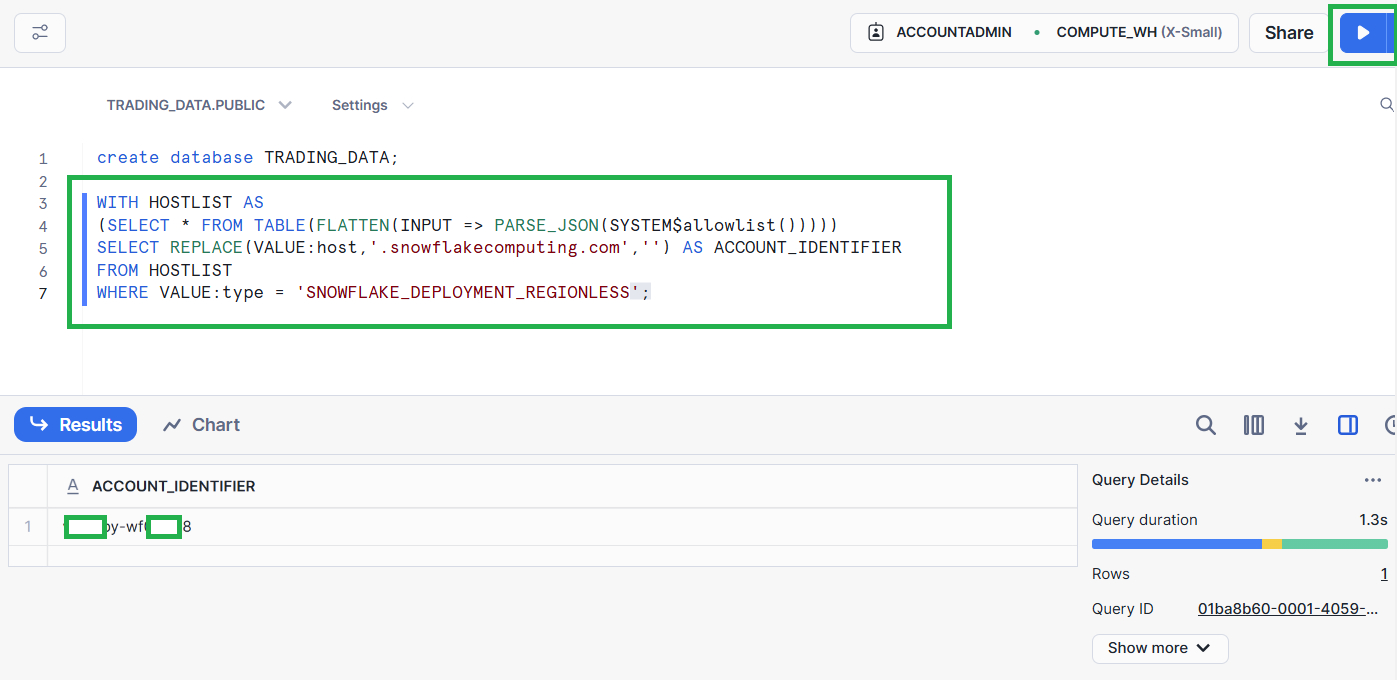
Once you’ve created the database, execute the following command in the same query editor pane to retrieve your account identifier information, which you’ll need to configure the Redpanda Connect pipeline:
WITH HOSTLIST AS
(SELECT * FROM TABLE(FLATTEN(INPUT => PARSE_JSON(SYSTEM$allowlist()))))
SELECT REPLACE(VALUE:host,'.snowflakecomputing.com','') AS ACCOUNT_IDENTIFIER
FROM HOSTLIST
WHERE VALUE:type = 'SNOWFLAKE_DEPLOYMENT_REGIONLESS';
The retrieved value will be in the format <organization_name>-<account_name>:
You also need to create and configure the key pair for your user account to access Snowflake programmatically or via Redpanda Connect.
Create a key pair in your local terminal by executing the following command:
openssl genrsa 2048 | openssl pkcs8 -topk8 -inform PEM -out rsa_key.p8You’ll be prompted to give an encryption password. Remember it, as you’ll need it while creating a public key in the next step and while configuring the Redpanda Connect pipeline later.
Create a public key by running the following command, and when prompted, enter the same password as before:
openssl rsa -in rsa_key.p8 -pubout -out rsa_key.pubAfter these steps, you should now have two files on your machine: rsa_key.p8 and rsa_key.pub.
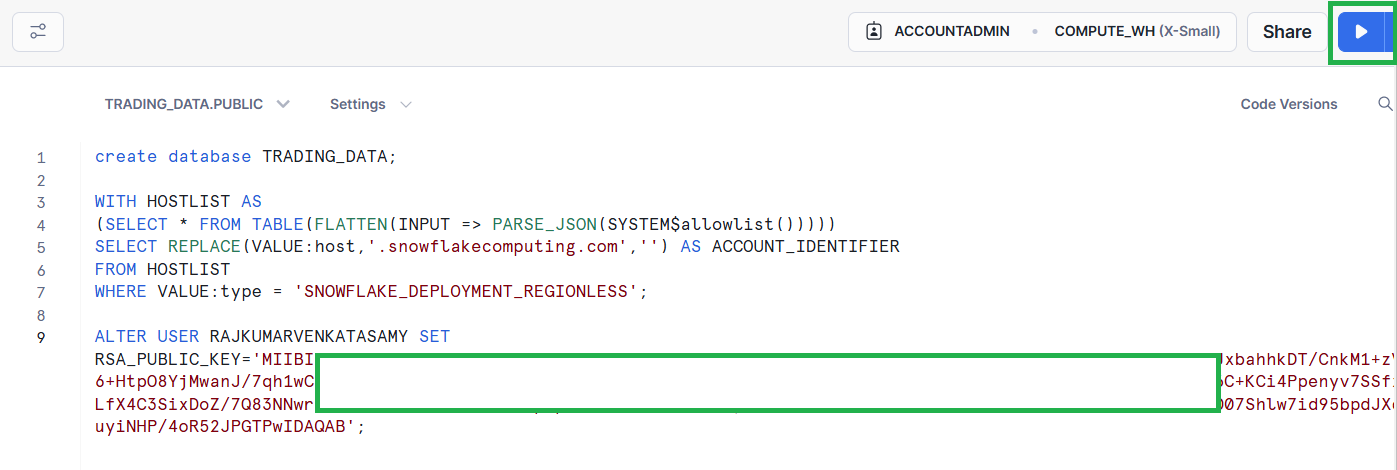
Switch back to the Snowflake SQL Worksheet and execute the following command:
ALTER USER <Your Snowflake username> SET RSA_PUBLIC_KEY='<Your public key>';Replace <Your Snowflake username> with your own information and <Your public key> with the contents of the rsa_key.pub file, excluding newlines and the public key delimiters:
Keep the browser window with the SQL Worksheet open. You’ll need this later.
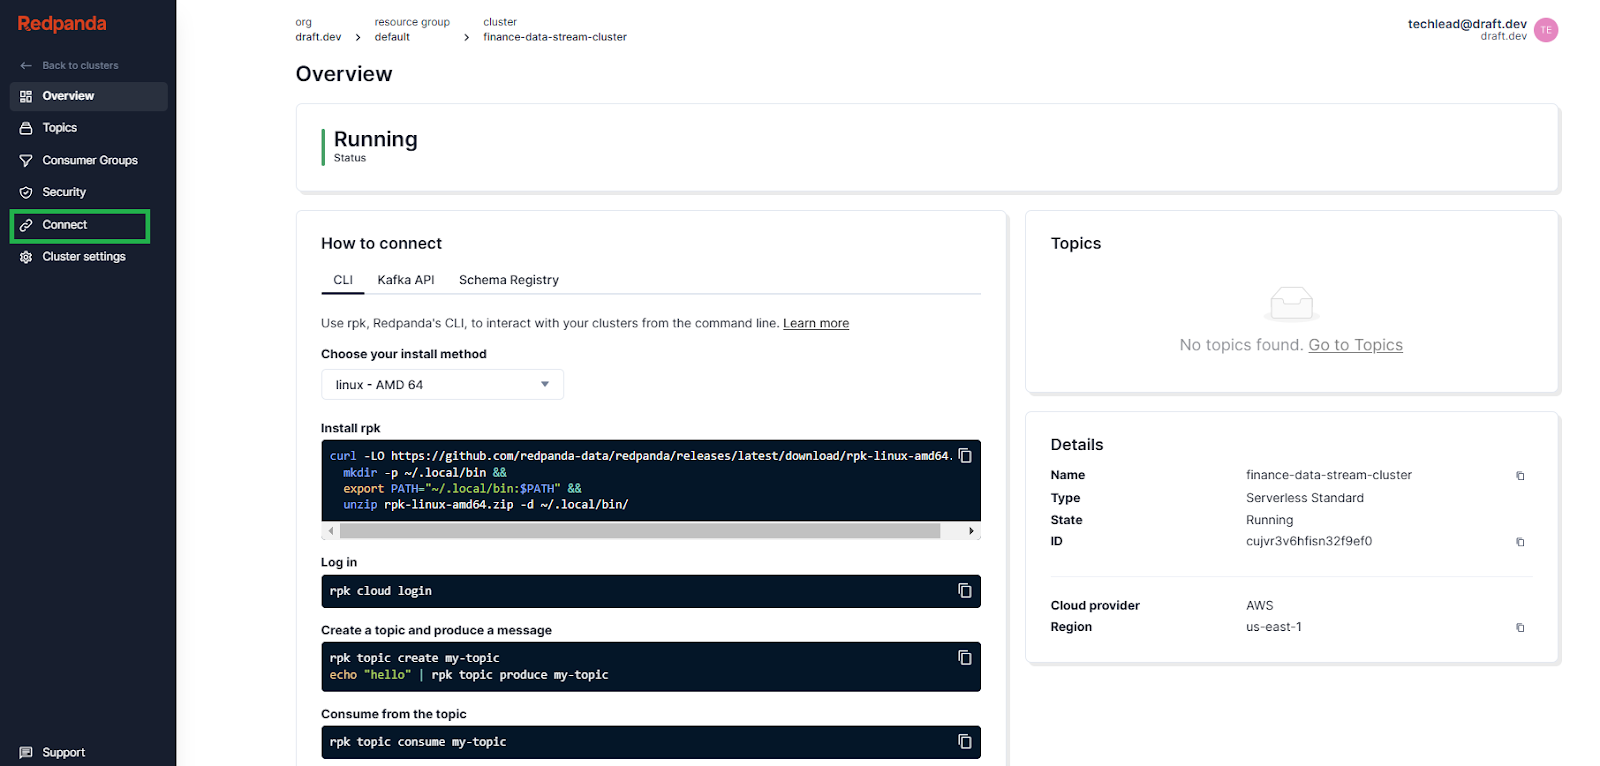
Switch back to Redpanda Cloud and your cluster overview page, then click Connect in the side menu to open Redpanda Connect:
The Redpanda Connect page has Pipelines and Secrets tabs. Before creating a pipeline, you need to add the password of your Redpanda user as a secret. This allows pipelines to access it without having to hard-code the value in the configuration file. Click the Secrets tab and click Create secret:
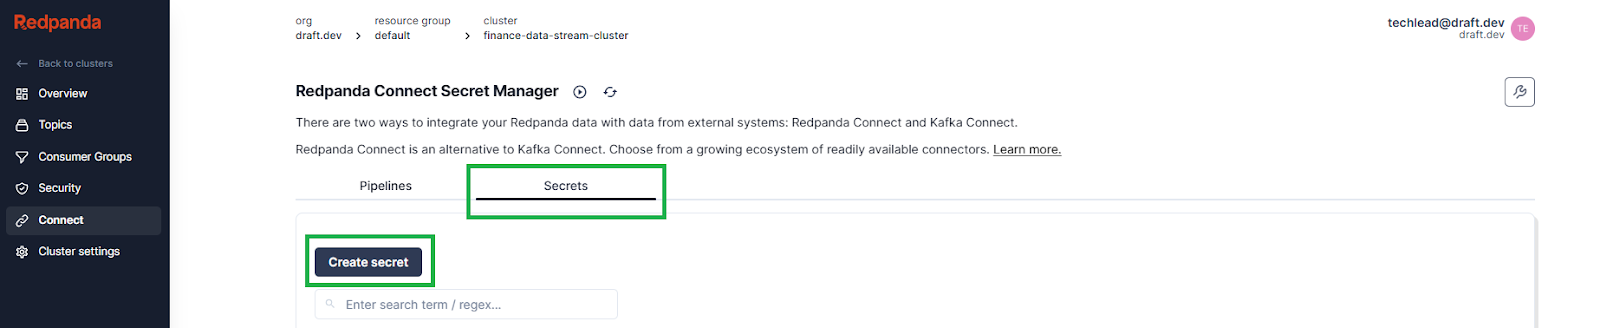
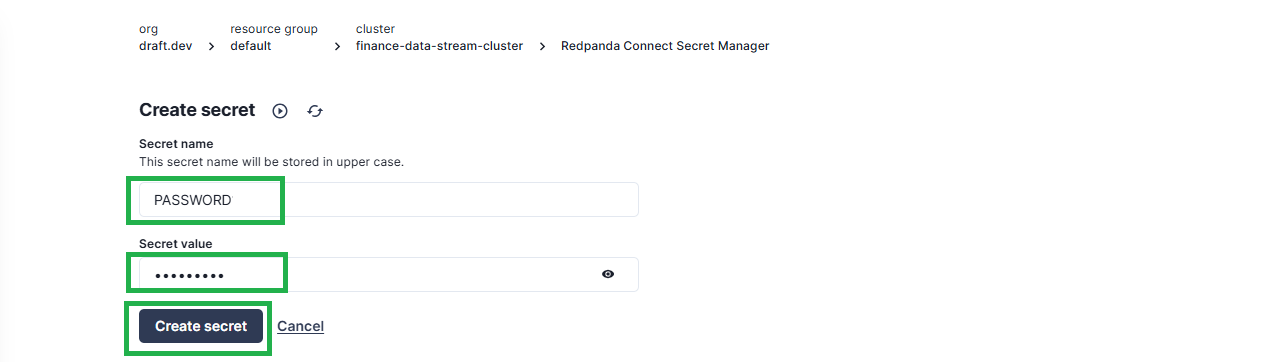
For the secret name, enter PASSWORD, and for the secret value, enter the actual password for the user you created earlier. Click Create secret.
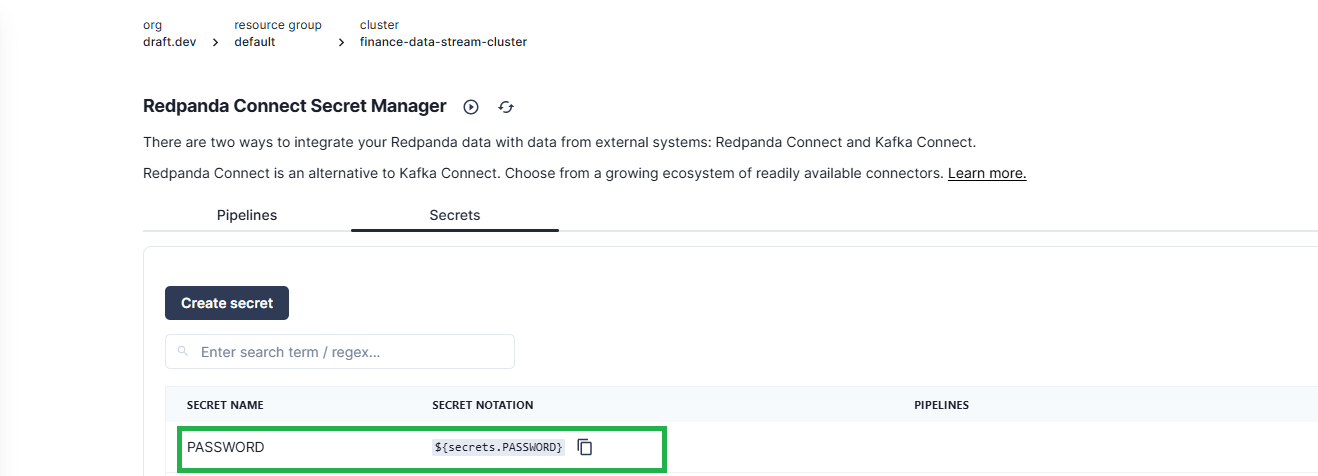
Once you’ve created the secret, you’ll be automatically redirected to a page that lists the created secret information:
Create two more secrets named SNOWFLAKE_KEY and SNOWFLAKE_KEY_PASS to allow Redpanda Connect to programmatically ingest the data successfully into the Snowflake database.
The value for SNOWFLAKE_KEY is derived from the contents of the rsa_key.p8 file created earlier.
Open a terminal and execute the following command to replace the newlines in the rsa_key.p8 file with escaped newlines:
awk '{printf "%s\\n", $0}' rsa_key.p8Set the output of the above command as the secret value for SNOWFLAKE_KEY.
The value for SNOWFLAKE_KEY_PASS is the password you used earlier when creating the key-pair file.

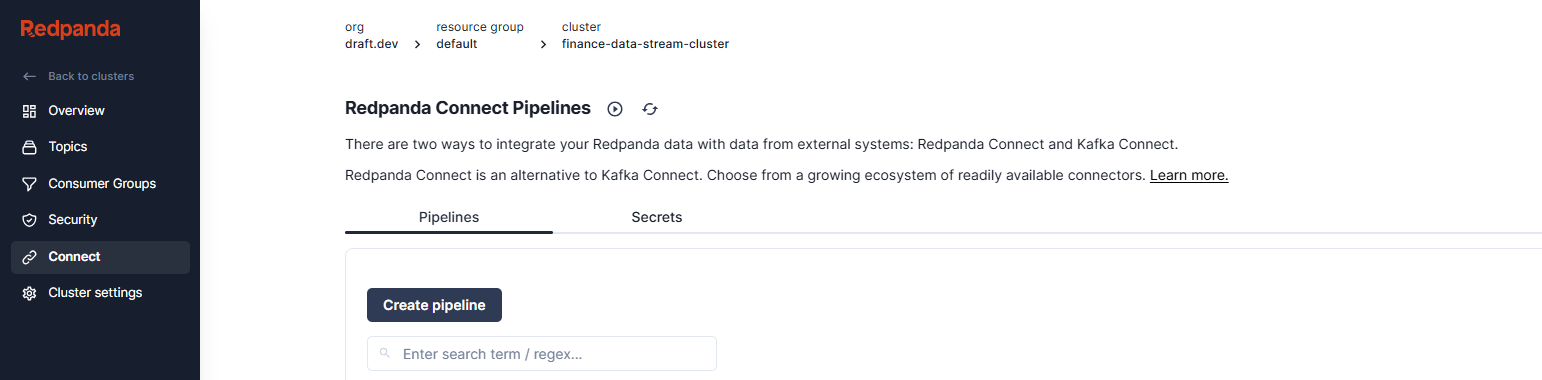
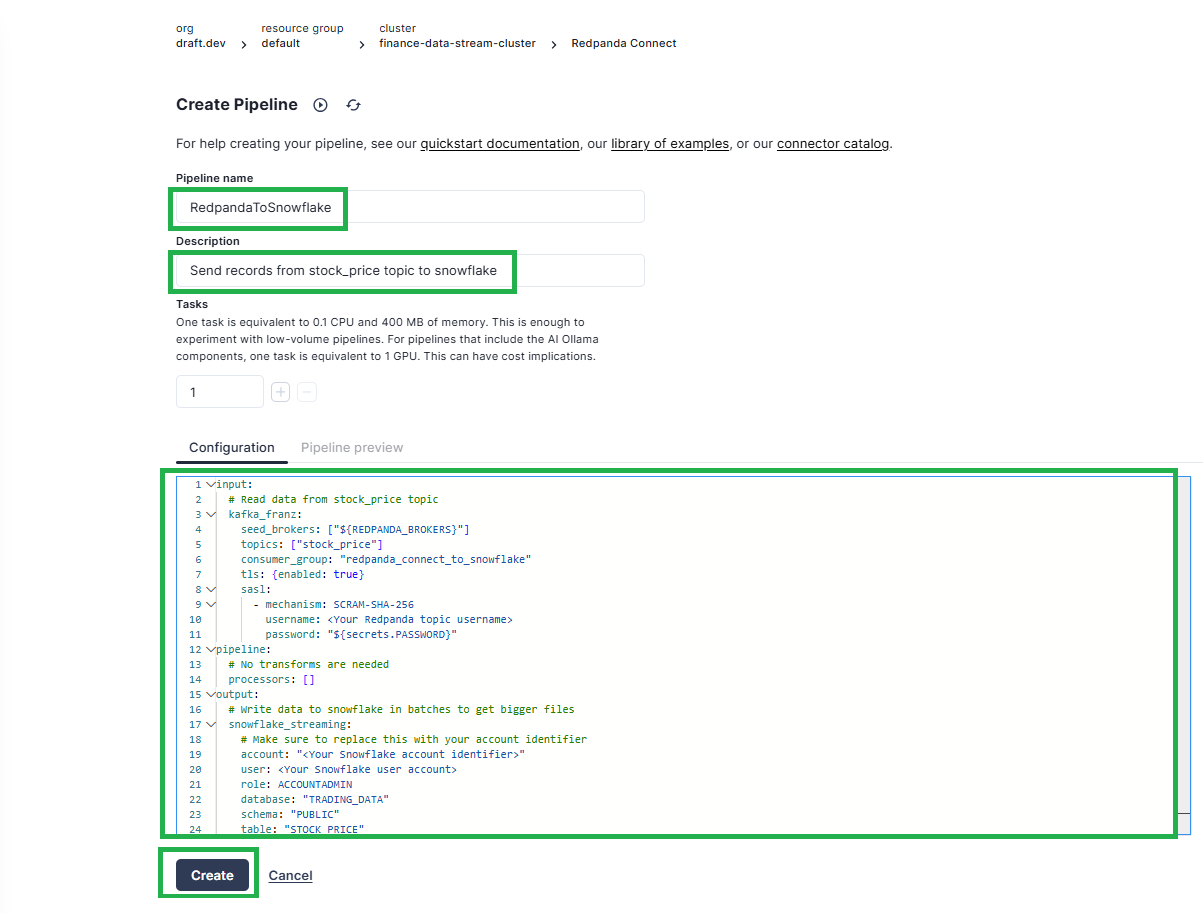
Now that the secrets are set, switch to the Pipelines tab and click Create pipeline:
Set the pipeline name to RedpandaToSnowflake and the description to something like “Send records from the stock_price topic to Snowflake.”
In the Configuration field, paste the following Connect configuration, replacing the placeholder values of <Your Redpanda topic username>, <Your Snowflake account identifier>, and <Your Snowflake user account> with your actual information:
input:
  # Read data from stock_price topic
  kafka_franz:
    seed_brokers: ["${REDPANDA_BROKERS}"]
    topics: ["stock_price"]
    consumer_group: "redpanda_connect_to_snowflake"
    tls: {enabled: true}
    sasl:
      - mechanism: SCRAM-SHA-256
        username: <Your Redpanda topic username>
        password: "${secrets.PASSWORD}"
pipeline:
  # No transforms are needed
  processors: []
output:
  # Write data to Snowflake in batches to get bigger files
  snowflake_streaming:
    # Make sure to replace this with your account identifier
    account: "<Your Snowflake account identifier>"
    user: <Your Snowflake user account>
    role: ACCOUNTADMIN
    database: "TRADING_DATA"
    schema: "PUBLIC"
    table: "STOCK_PRICE"
    # Inject your private key and password
    private_key: "${secrets.SNOWFLAKE_KEY}"
    private_key_pass: "${secrets.SNOWFLAKE_KEY_PASS}"
    # Automatically create tables and add new columns
    schema_evolution:
      enabled: true
    max_in_flight: 1
    batching:
      period: 30s
Click Create to create the pipeline:
You’ll be automatically redirected to the Pipelines page. Within a few seconds, you should see the created pipeline with a “Running” status:
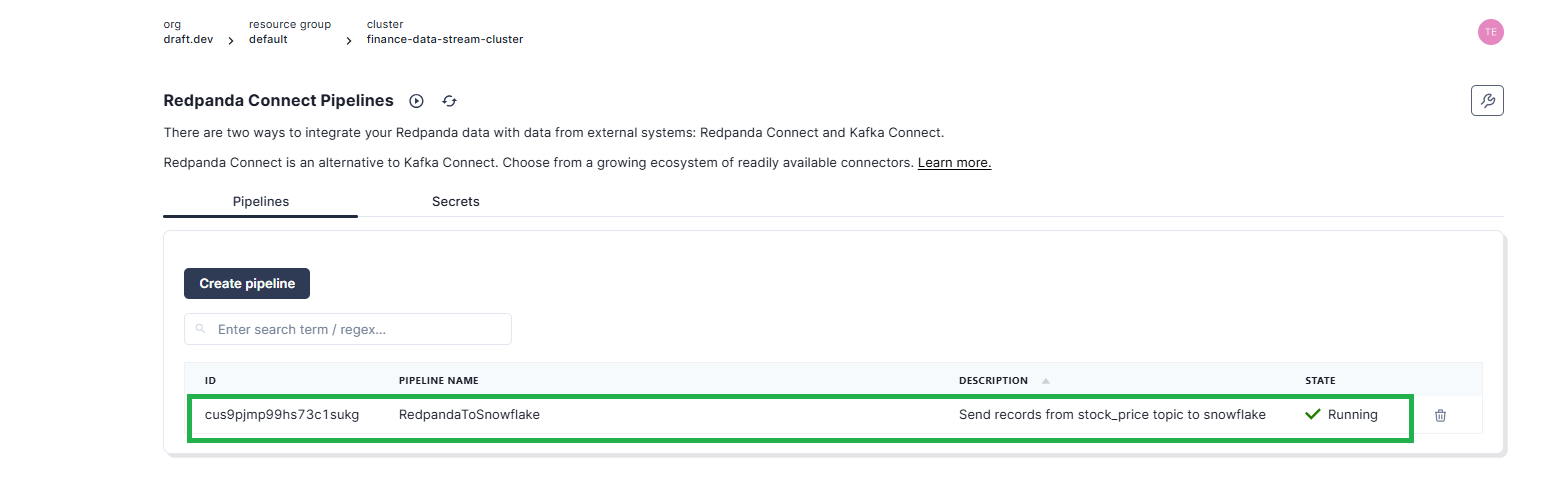
Leave the pipeline running so it can consume the messages from the Redpanda topic when they’re published by the producer application.
The final step involves setting up the producer application to publish the messages to the topic.
In your Python virtual environment, execute the following command to install the dependency to interact with Redpanda:
pip install kafka-python==2.0.3Create a project directory on your machine. Inside it, create a main.py file with the following code, which generates random stock price data in JSON format to be published to the stock_price topic that the Redpanda Connect pipeline listens to:
from datetime import datetime, timedelta
import json
import random
import time
import uuid

from kafka import KafkaProducer


def generate_random_stock_price(ticker, base_price, date):
    """
    Generates random stock price data for a given ticker and date.
    """
    return {
        "Date": date.strftime("%Y-%m-%d"),
        "Ticker": ticker,
        "ClosingPriceUSD": round(base_price + random.uniform(-10, 10), 2),
    }


def send_stock_price_data():
    """
    Sends stock price data to a Redpanda topic using a Kafka producer.
    """
    topic = "stock_price"
    producer = KafkaProducer(
        bootstrap_servers="<Your Redpanda Serverless broker hostname:port>",
        security_protocol="SASL_SSL",
        sasl_mechanism="SCRAM-SHA-256",
        sasl_plain_username="<Your Redpanda user>",
        sasl_plain_password="<Password of your Redpanda user>",
        key_serializer=str.encode,
        value_serializer=lambda v: json.dumps(v).encode("utf-8"),
    )

    tickers = ["SPX", "AAPL", "GOOGL", "TSLA", "AMZN"]  # Sample stocks
    base_prices = {"SPX": 4500, "AAPL": 150, "GOOGL": 2800, "TSLA": 700, "AMZN": 3400}
    start_date = datetime(2023, 1, 1)

    while True:
        for ticker in tickers:
            stock_data = generate_random_stock_price(
                ticker, base_prices[ticker], start_date
            )
            message_key = str(uuid.uuid4())

            future = producer.send(topic, key=message_key, value=stock_data)
            result = future.get(timeout=15)

            print(
                f"Message sent | Ticker: {ticker} | Date: {stock_data['Date']} | Price: {stock_data['ClosingPriceUSD']} | Partition: {result.partition}, Offset: {result.offset}"
            )

        start_date += timedelta(days=1)  # Increment the date for the next batch
        time.sleep(
            10
        )  # Wait for 10 seconds before generating the next set of stock data


# Call the function to send the stock price data
send_stock_price_data()
Make sure to update the following variables with your specific Redpanda Serverless configuration:
       bootstrap_servers="<Your Redpanda Serverless broker hostname:port>",
        sasl_plain_username="<Your Redpanda user>",
        sasl_plain_password="<Password of your Redpanda user>",
Save the file and execute the producer application in a terminal by running py main.py.
You should see the following output, indicating that the stock prices are being published to the Redpanda topic:
Message sent | Ticker: SPX | Date: 2023-01-01 | Price: 4491.51 | Partition: 0, Offset: 0
Message sent | Ticker: AAPL | Date: 2023-01-01 | Price: 152.56 | Partition: 0, Offset: 1
Message sent | Ticker: GOOGL | Date: 2023-01-01 | Price: 2800.03 | Partition: 0, Offset: 2
Message sent | Ticker: TSLA | Date: 2023-01-01 | Price: 690.83 | Partition: 0, Offset: 3
Message sent | Ticker: AMZN | Date: 2023-01-01 | Price: 3407.92 | Partition: 0, Offset: 4

…
…
…
Message sent | Ticker: SPX | Date: 2023-01-02 | Price: 4492.7 | Partition: 0, Offset: 5
Message sent | Ticker: AAPL | Date: 2023-01-02 | Price: 146.03 | Partition: 0, Offset: 6
Message sent | Ticker: GOOGL | Date: 2023-01-02 | Price: 2806.19 | Partition: 0, Offset: 7
Message sent | Ticker: TSLA | Date: 2023-01-02 | Price: 694.16 | Partition: 0, Offset: 8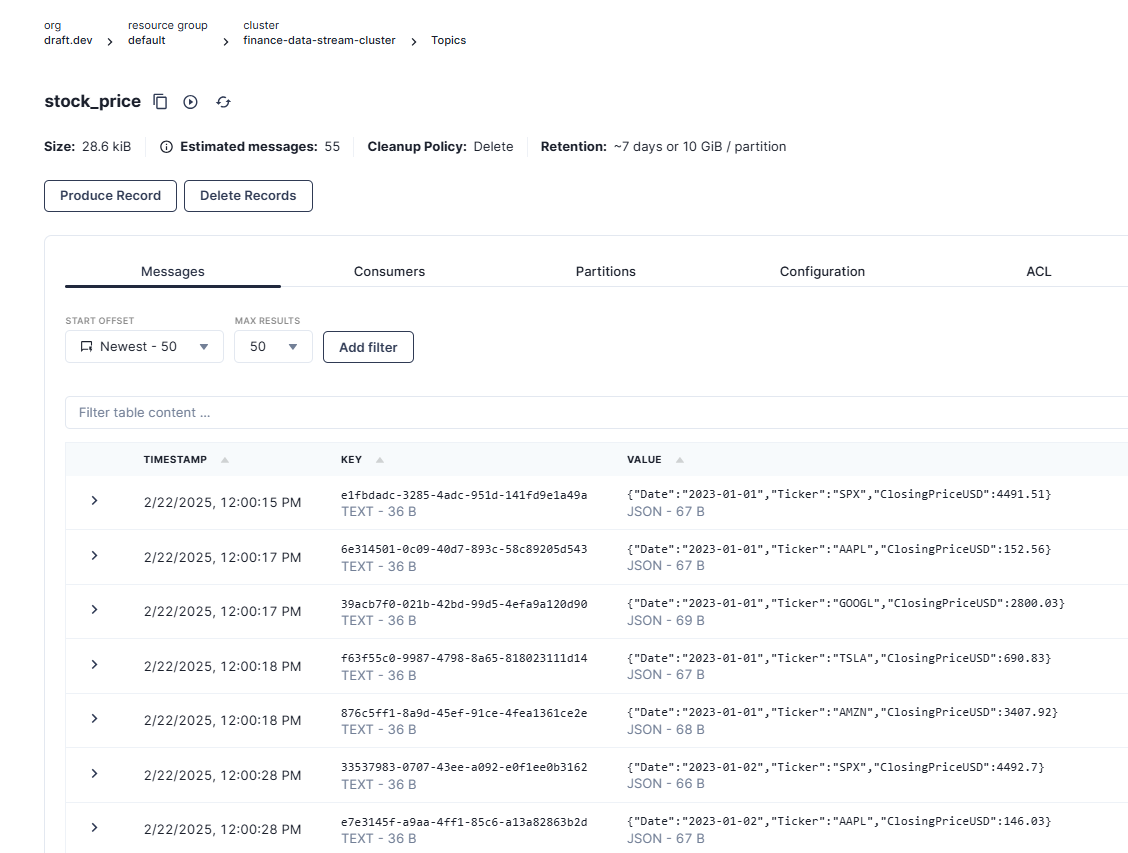
Message sent | Ticker: AMZN | Date: 2023-01-02 | Price: 3396.81 | Partition: 0, Offset: 9Go back to your Redpanda Serverless account in your browser and navigate to the Topics screen. If you select the stock_price topic, you should see that messages containing stock price data are streaming into the topic:
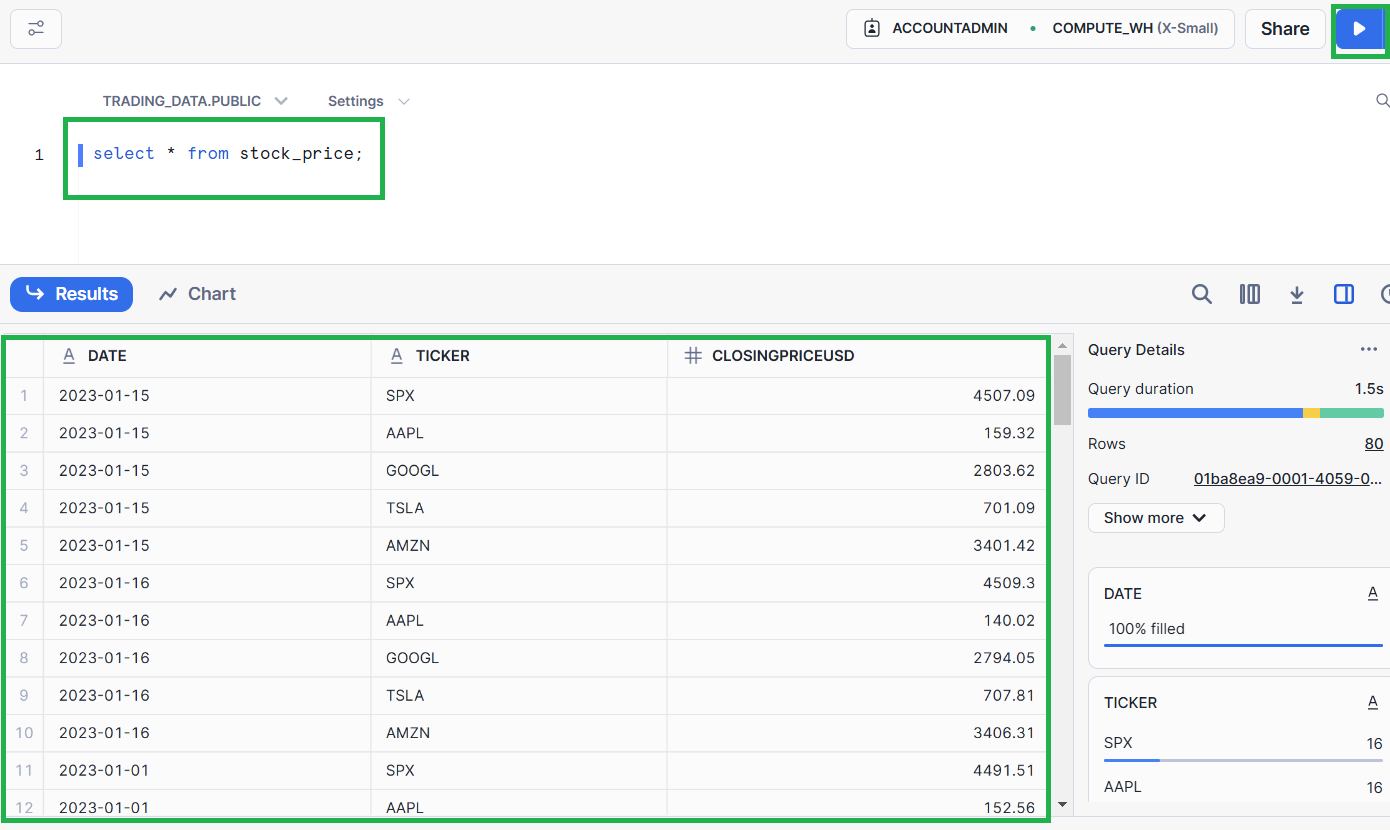
To check if the data is being streamed into the Snowflake table, switch to the Snowflake SQL Worksheet in your browser and execute the following SQL command:
select * from stock_price;You should see the data continuously growing in the table, as the producer application generates new data and the pipeline process streams it into the Snowflake table.
And you’re done!
Congrats! You’ve just established a live data stream from Redpanda into Snowflake for real-time insights. This setup is ideal for near real-time analytics, such as portfolio monitoring and risk assessment.
To see what else you can build easier with Redpanda, check the documentation and browse the Redpanda blog for more tutorials. If you have questions or want to chat with the team, join the Redpanda Community on Slack.
Subscribe to our VIP (very important panda) mailing list to pounce on the latest blogs, surprise announcements, and community events!
Opt out anytime.