


Governing AI agents in production: what's new in the Redpanda Agentic Data Plane
Now deployable on Amazon Web Services (AWS)
How to stream e-commerce order data for real-time insights the easy way


Applications that depend on fresh data need pipelines that process events the moment they arrive — think fraud detection, real-time dashboards, or keeping operational and analytical systems in sync.
Redpanda gives you high-throughput data streaming, and Snowflake provides a data warehouse that scales for analytics. Together, they let you move data continuously and query it with low latency.
In this tutorial, you’ll learn how to build a pipeline that streams simulated e-commerce order data from a Redpanda topic into a Snowflake table using Redpanda Connect. By the end, you’ll have a working pipeline you can adapt for your own use cases. Ready?
To show you how to build the pipeline, let's use an example of an e-commerce platform that wants to track incoming orders in real time for analytics and fraud detection. Your pipeline will:
Here's a simplified flow of how the data moves across components:
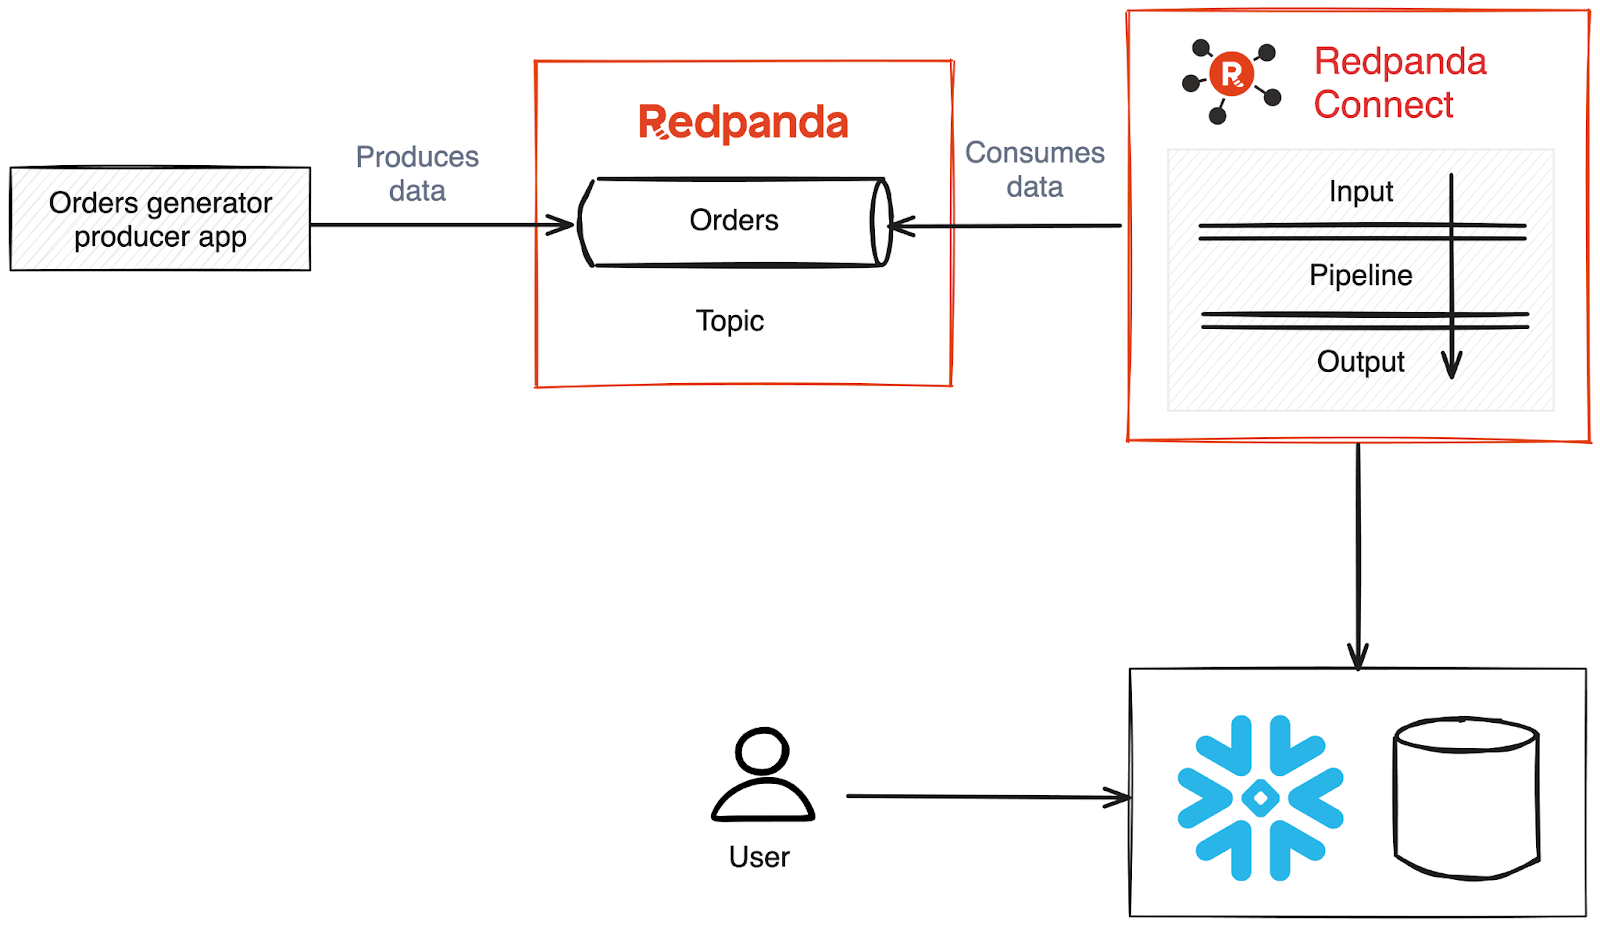
This setup lets you see orders from your e-commerce customers in real time, so you can build dashboards or set up alerts for potential issues.
You'll create some fake order data using this schema:
create table ORDERS (
    order_id STRING,
    user_id STRING,
    product_id STRING,
    quantity INT,
    order_total DOUBLE,
    order_time TIMESTAMP
);
You can use a Python script or a Kafka producer to generate and send data:
{
  "order_id": "ORD123456",
  "user_id": "USR001",
  "product_id": "PRD009",
  "quantity": 2,
  "order_total": 49.99,
  "order_time": "2025-07-23T09:30:00Z"
}
The full source code is available in this GitHub repository.
You'll need the following to complete this tutorial:
To stream data from Redpanda Serverless to Snowflake, you'll need to create a topic in Redpanda where your stock price data from a producer app will be stored.
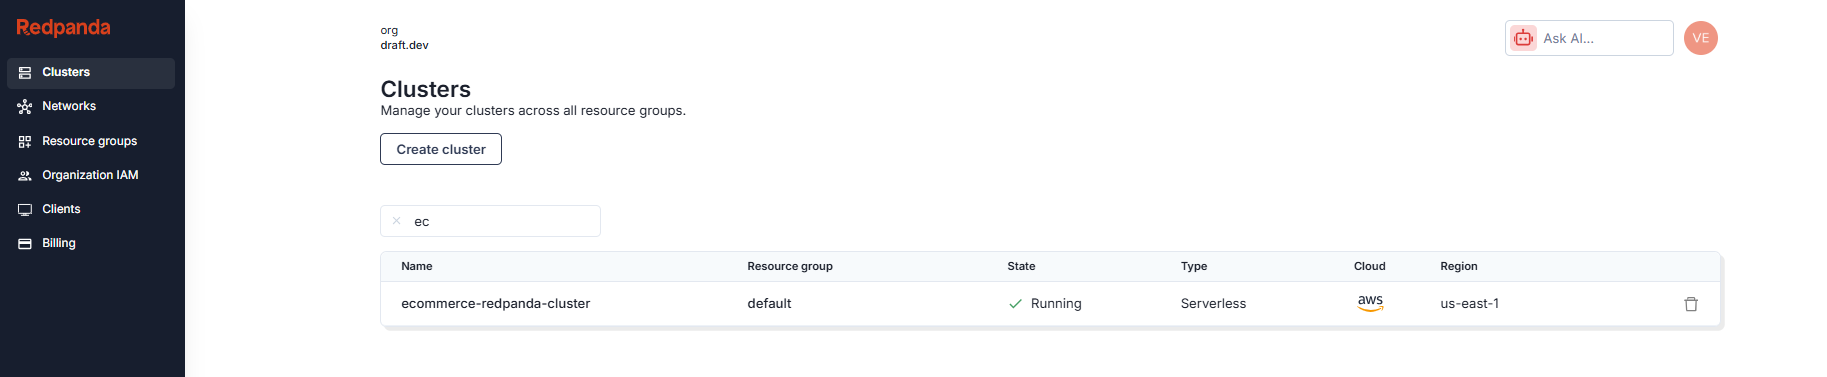
Log in to Redpanda Cloud with your account. You should see the cluster you created in the prerequisites.
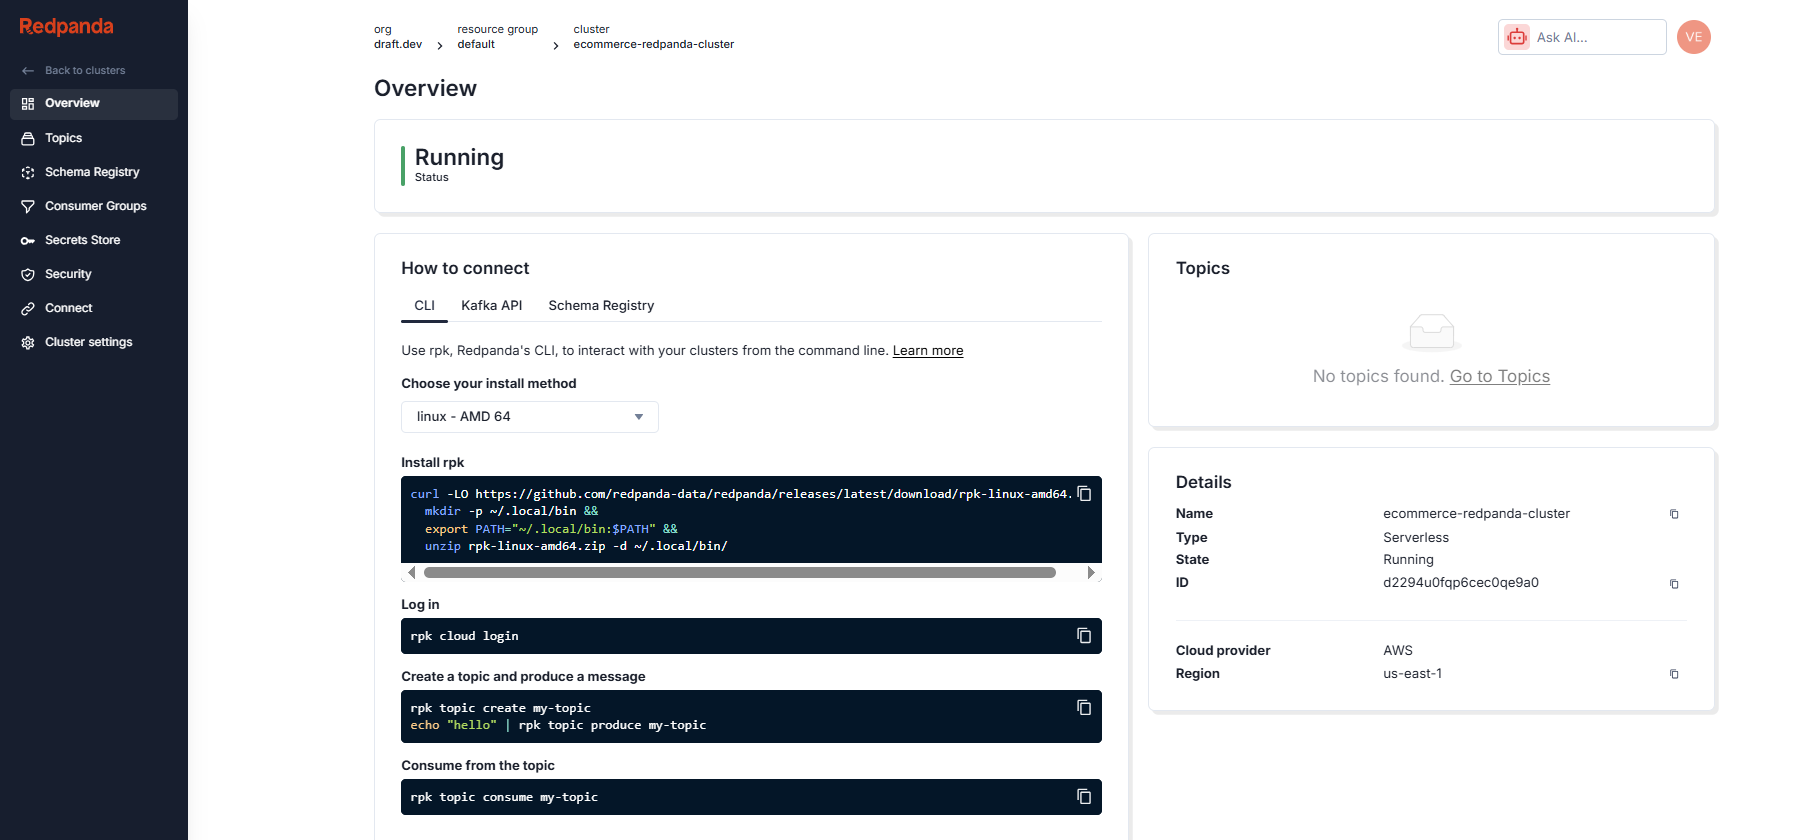
Click the cluster name to go to the overview page.
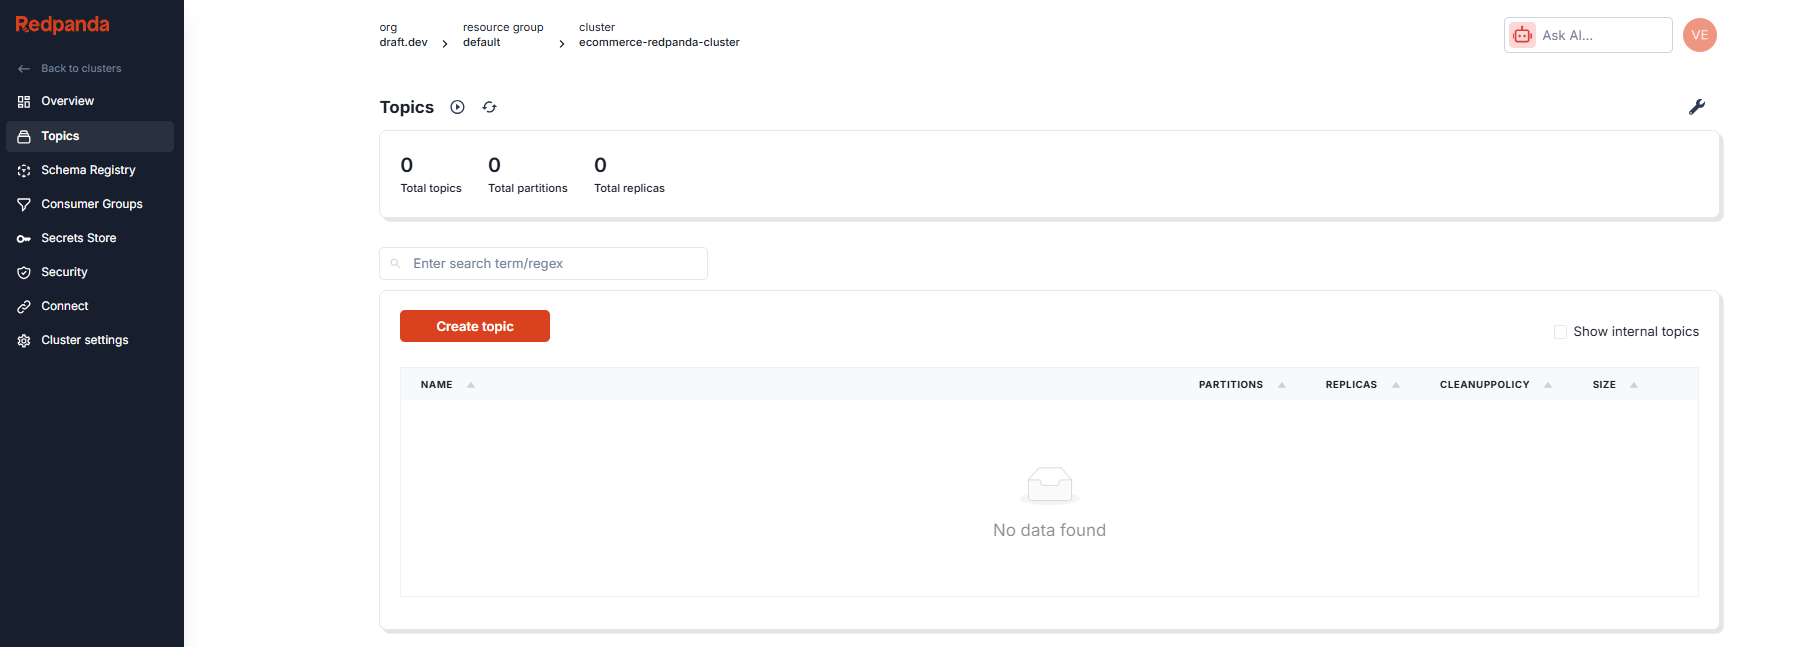
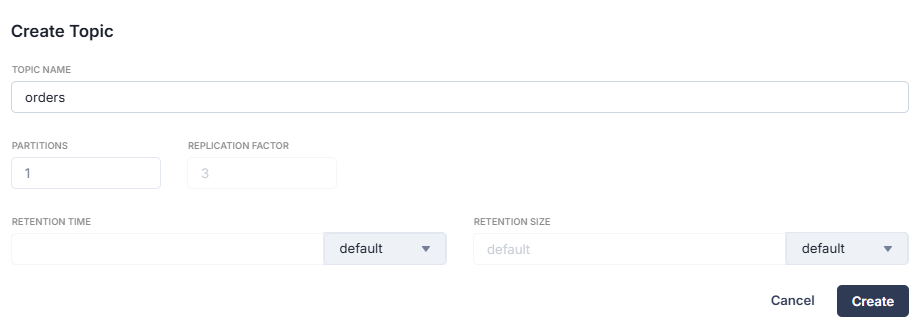
Then click Topics in the side menu to view the list of topics in the cluster. There won't be any topics at the moment as the cluster is new. Click Create topic to create one:
Name the topic "orders" and click Create to accept the other default options:
The list now includes your newly created topic:

You can improve your Redpanda Serverless cluster security by making sure all broker communication is encrypted. Transport Layer Security (TLS) provides this encryption by default on your Redpanda Serverless clusters. To interact with topics, whether reading or writing, you'll need to set up a user and assign the necessary permissions for that user to access the cluster.
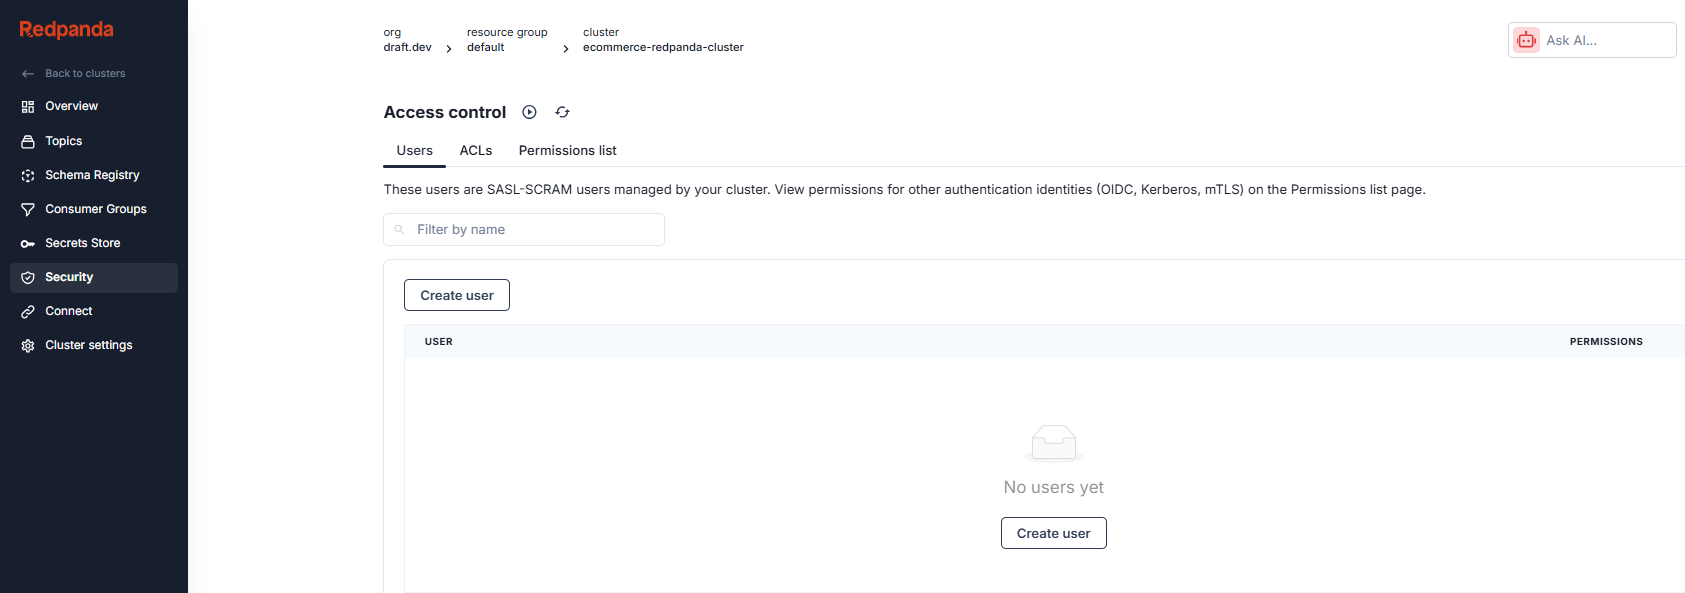
To begin this process, go to the Security section in the side menu. From there, select the Create user option on the access control screen.
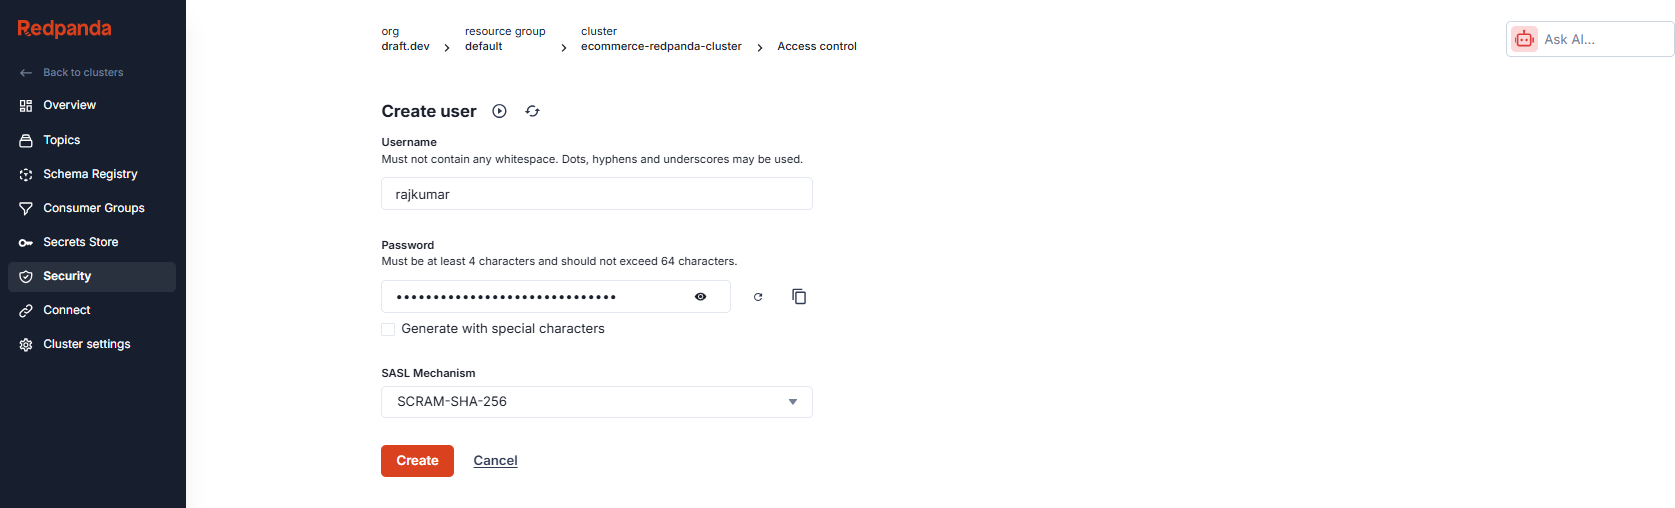
Enter a username and password. Choose SCRAM-SHA-256 for the SASL mechanism and click Create:
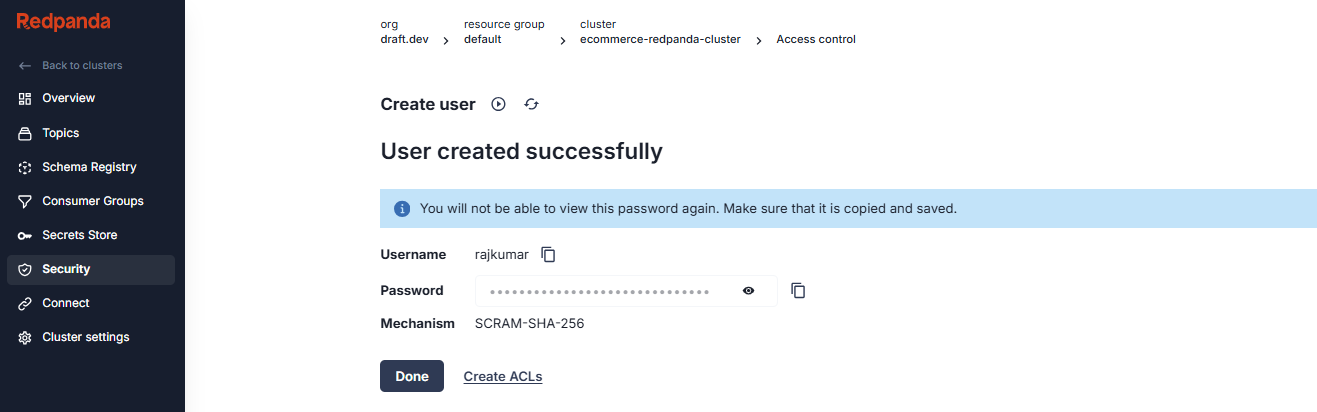
You'll see a screen confirming the user was created. You can view or copy the user's password by clicking the icons next to it. Save this as you'll use it later. Click the Create ACLs link to set up the user's permissions, which you'll do in the next step.
On the list of access-control lists (ACLs), find and double-click the ACL's principal name, which corresponds to the username you just created.

On the next screen, select Allow all operations to grant the user full access for this example.
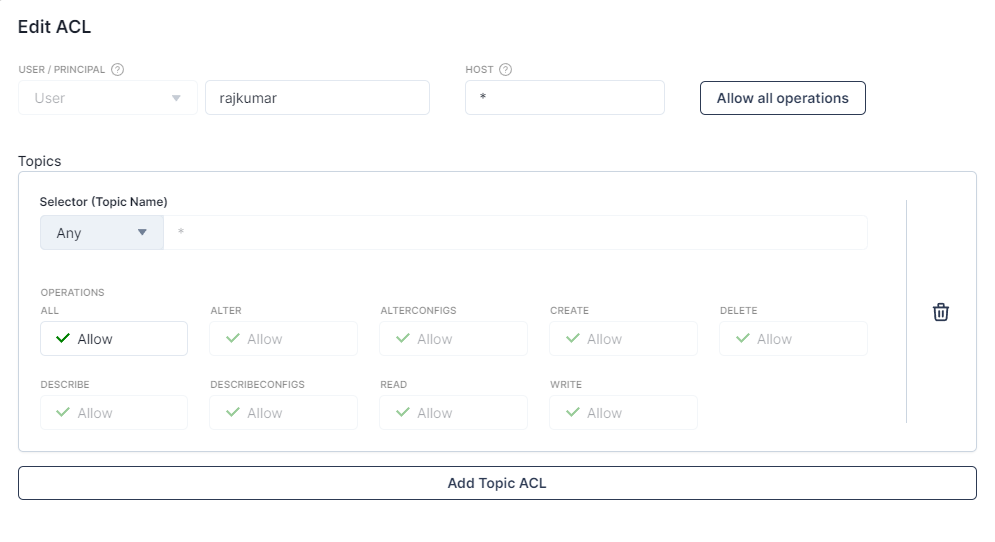
Scroll to the bottom of the screen and click OK. You're now ready to set up Snowflake.
To begin, log in to Snowflake. On the landing page, click Query data.
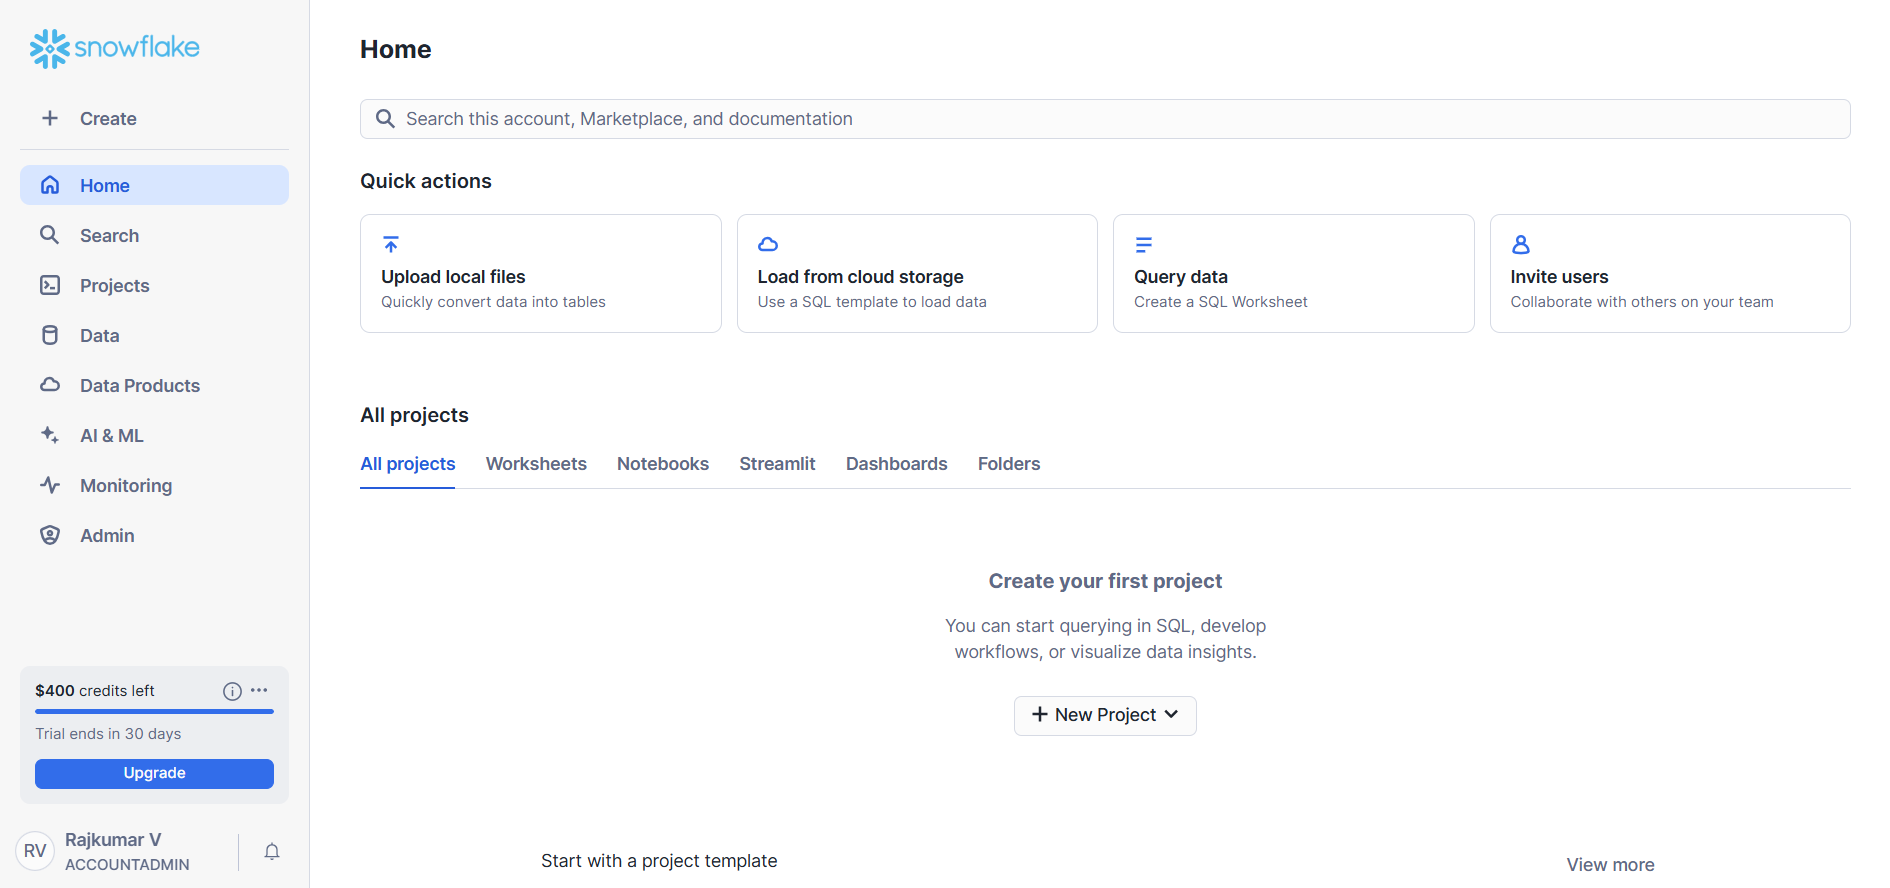
This will open an SQL worksheet, where you can interact with your Snowflake database. You can run commands and explore various database objects through this user interface.

In the query editor pane, enter the SQL command create database ECOMMERCE; to set up a new database in Snowflake, then click the Execute button.
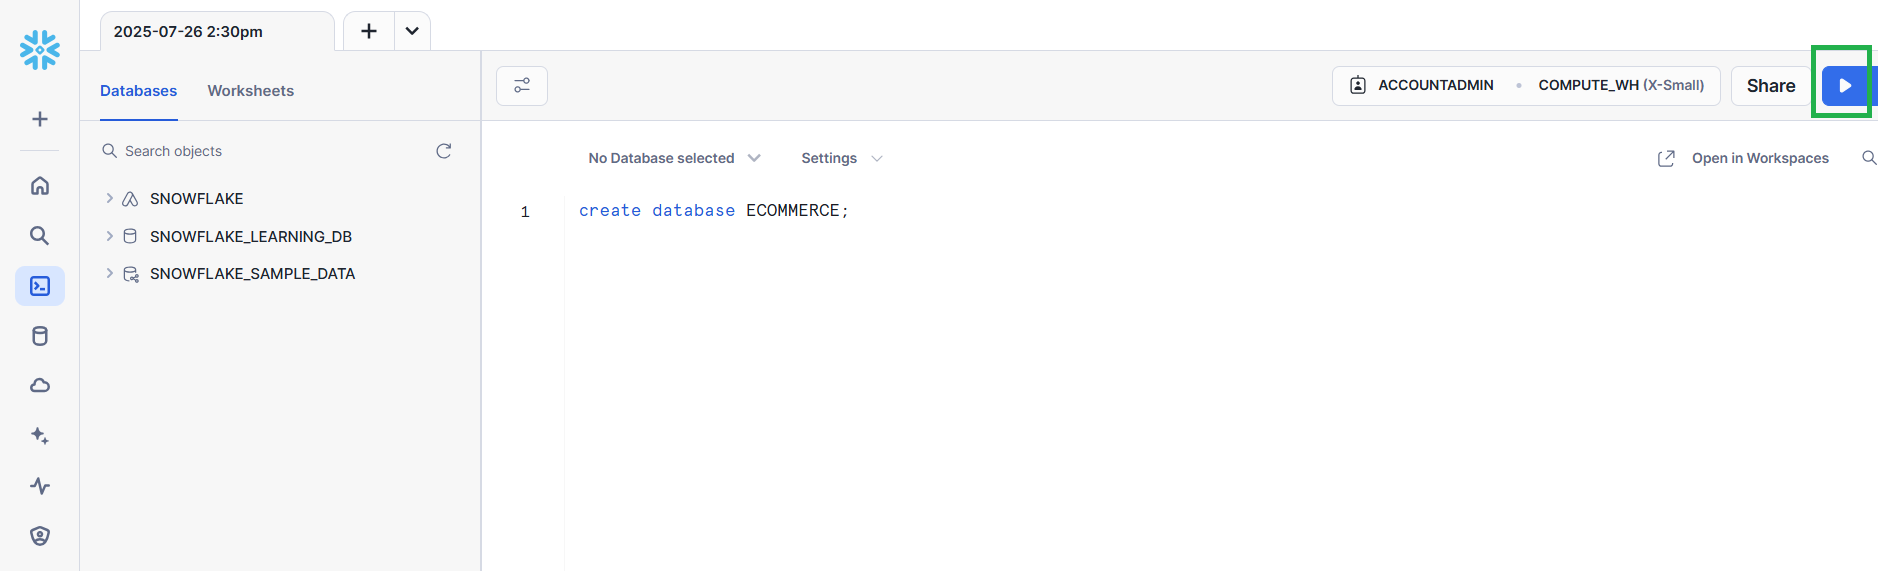
You won't need to manually create a table; the Redpanda Connect pipeline you'll set up later will handle this automatically.
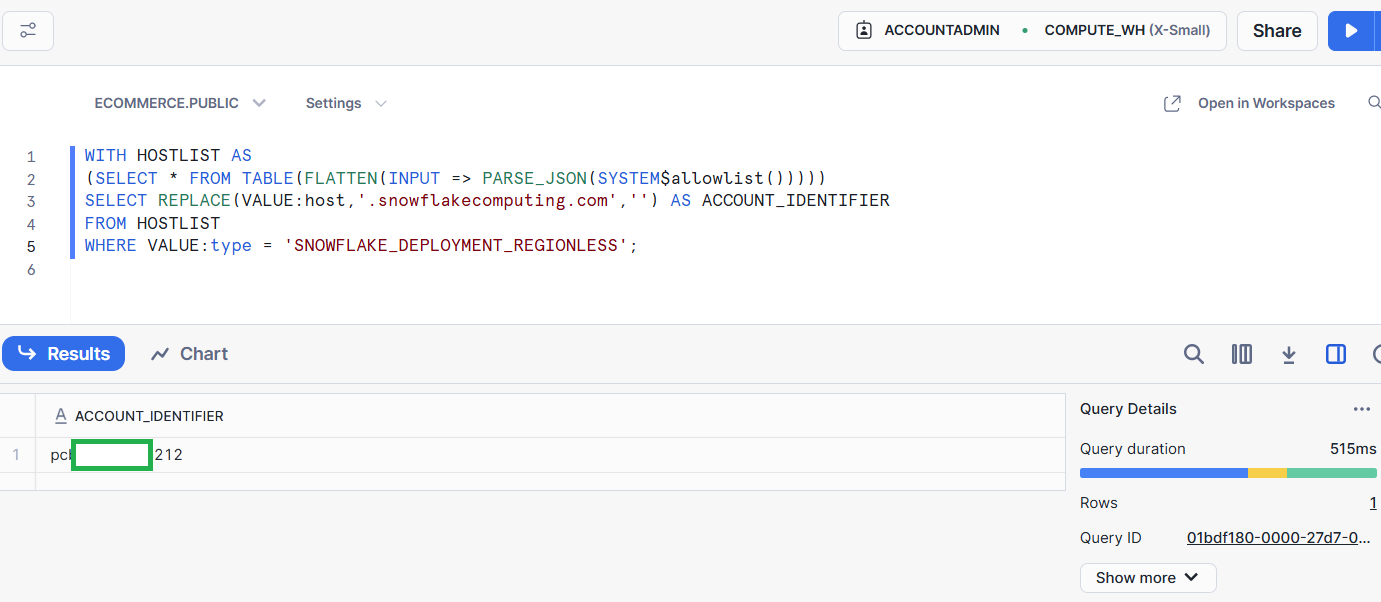
Once your database is set up, execute the following command in the same query editor pane to retrieve your account identifier:
WITH HOSTLIST AS
(SELECT * FROM TABLE(FLATTEN(INPUT => PARSE_JSON(SYSTEM$allowlist()))))
SELECT REPLACE(VALUE:host,'.snowflakecomputing.com','') AS ACCOUNT_IDENTIFIER
FROM HOSTLIST
WHERE VALUE:type = 'SNOWFLAKE_DEPLOYMENT_REGIONLESS';
You'll need this identifier to configure the Redpanda Connect pipeline to connect with your Snowflake resource.
The value you retrieve will be in a specific format.
In your local terminal, use the following command to set up a key pair for your user account so it can connect to Snowflake programmatically, including through Redpanda Connect:
openssl genrsa 2048 | openssl pkcs8 -topk8 -inform PEM -out rsa_key.p8You'll be prompted to enter an encryption password. Make sure to remember this password as you need it to create a public key in the next step and later again when configuring the Redpanda Connect pipeline.
Run the following command to create a public key:
openssl rsa -in rsa_key.p8 -pubout -out rsa_key.pubWhen prompted, enter the encryption password.
After completing these steps, you should have two files on your machine: rsa_key.p8 and rsa_key.pub.
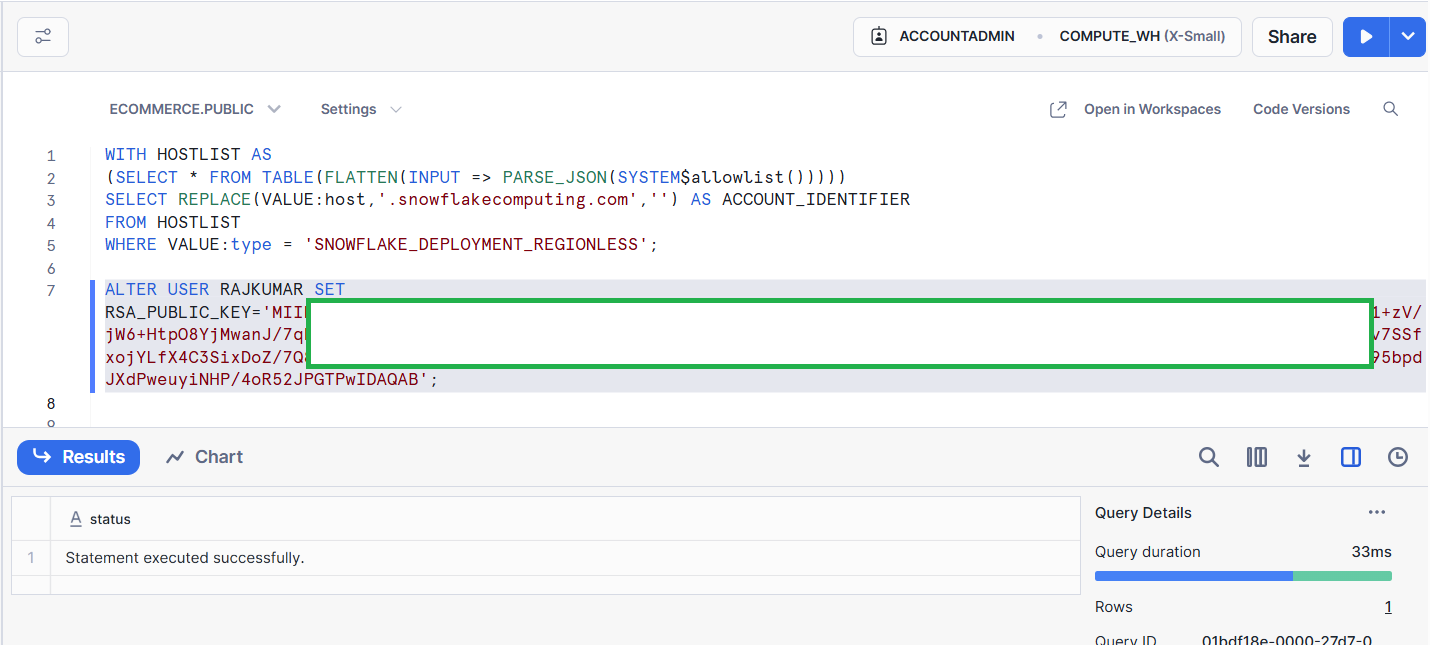
Switch back to the Snowflake SQL worksheet. Run the following command:
ALTER USER <Your Snowflake username> SET RSA_PUBLIC_KEY='<Your public key>';Replace <Your Snowflake username> with your actual Snowflake username and <Your public key> with the contents of your rsa_key.pub file. Ensure you exclude any newlines and the public key delimiters when inserting the content.
Keep the browser window with the SQL worksheet open, as you'll use it again later.
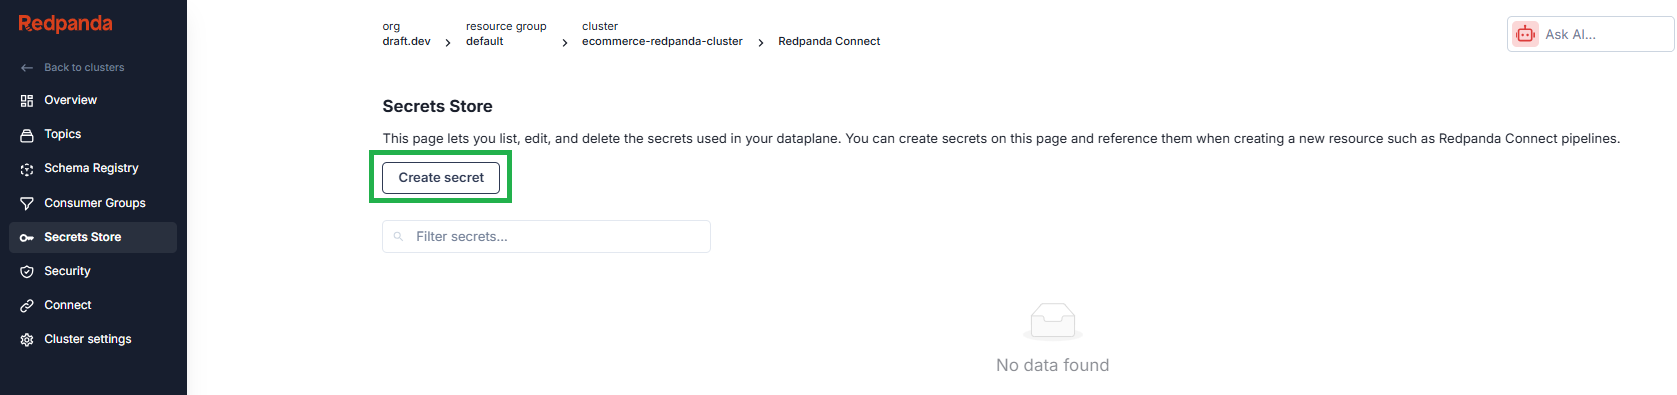
Go back to Redpanda Cloud and your cluster overview page. From there, select Secret Stores in the side menu to open the Redpanda Secrets Store.

Before setting up a Redpanda Connect pipeline to stream the data from the topic to Snowflake, you need to secure your Redpanda cluster user's password by adding it as a secret. This allows pipelines to access the password without embedding it directly into the configuration. Click Create secret.
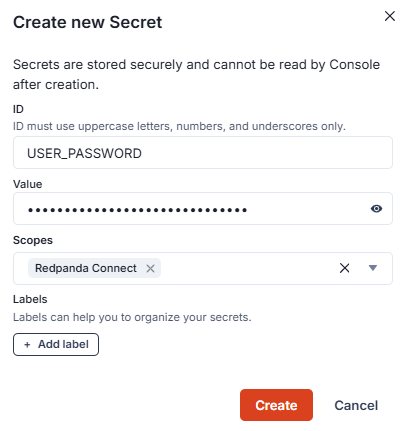
Type in USER_PASSWORD as the secret's name. For the value, use the password you set up earlier for your Redpanda Serverless cluster user. Under Scopes, select Redpanda Connect, then hit Create to save your new secret.
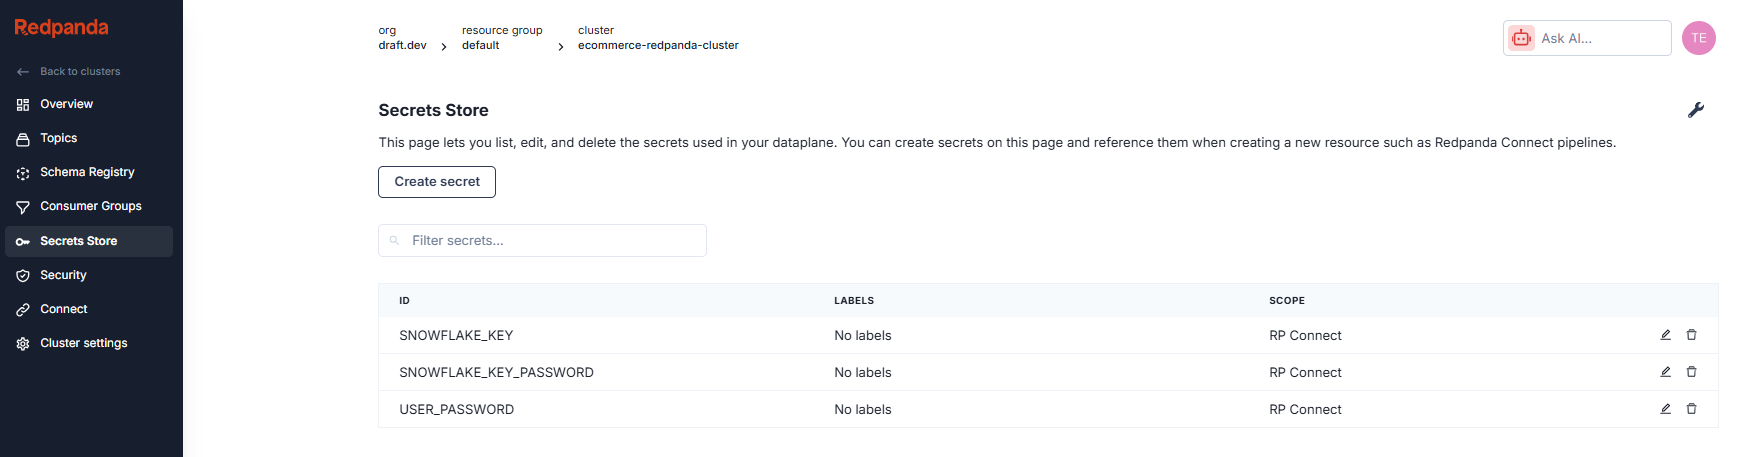
Once it's created, you'll see a page that lists the created secret information:
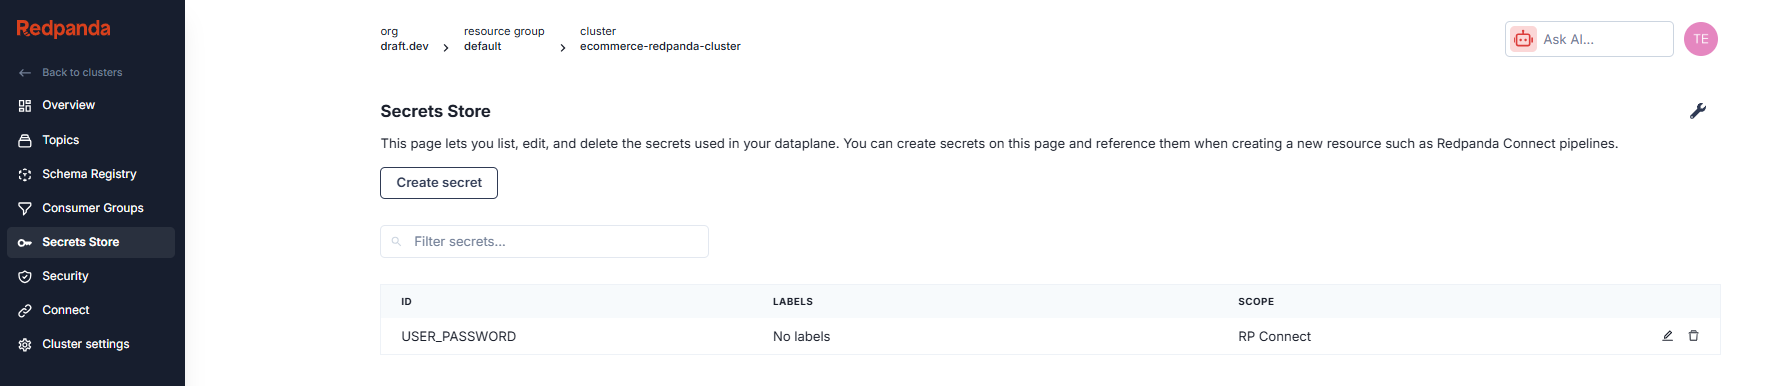
Now create two more secrets, SNOWFLAKE_KEY and SNOWFLAKE_KEY_PASSWORD, so Redpanda Connect can automatically push data into your Snowflake database.
The SNOWFLAKE_KEY value is based on the contents of that rsa_key.p8 file you created earlier.
Open a terminal and execute the following command to replace the newlines in the rsa_key.p8 file with escaped newlines:
awk '{printf "%s\\n", $0}' rsa_key.p8Set the output of the above command as the secret value for SNOWFLAKE_KEY.
The value for SNOWFLAKE_KEY_PASSWORD is the password you used earlier when creating the key-pair file.
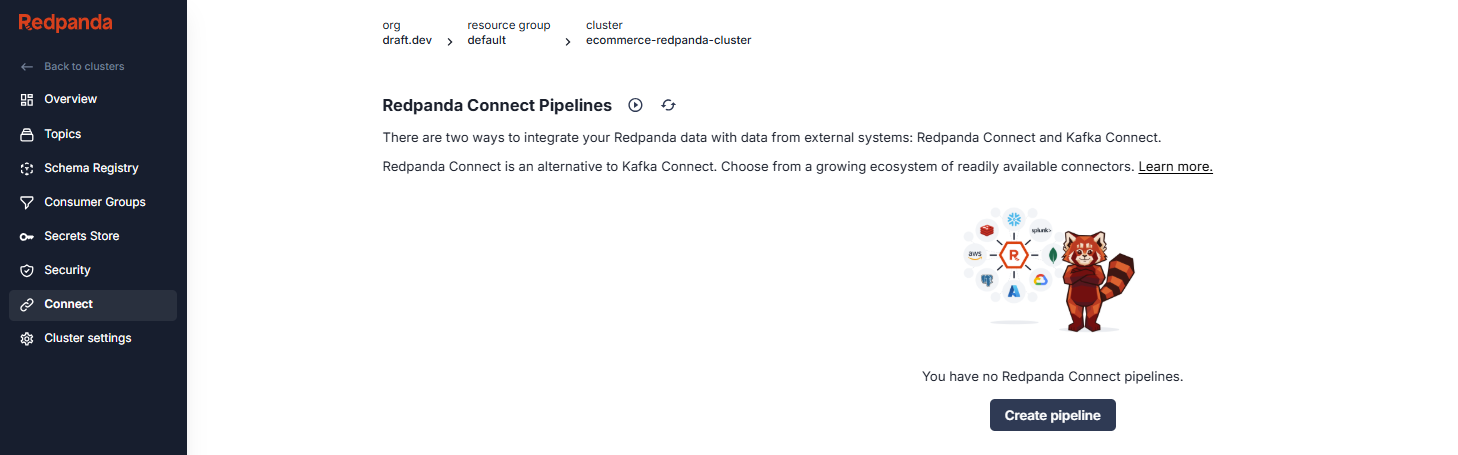
Now that you've configured your secrets, you can move on to setting up a Redpanda Connect pipeline. Go to the Connect tab in the left side menu, and click Create pipeline.
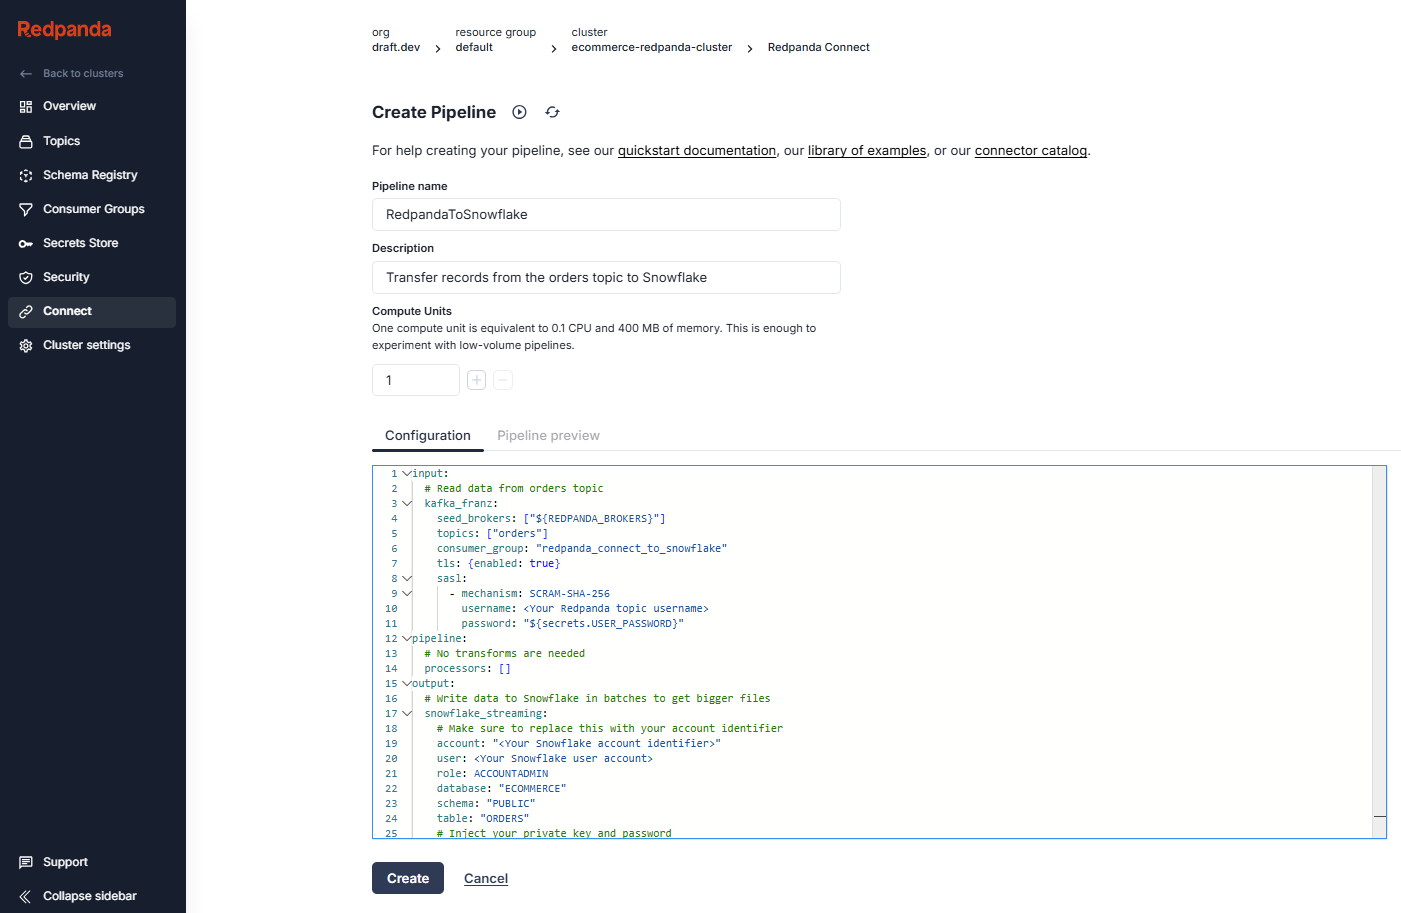
Name the pipeline "RedpandaToSnowflake" and add a relevant description, such as "Transfer records from the orders topic to Snowflake".
In the Configuration field, insert the following Connect configuration, substituting the bracketed placeholder values with your specific details:
input:
  # Read data from orders topic
  kafka_franz:
    seed_brokers: ["${REDPANDA_BROKERS}"]
    topics: ["orders"]
    consumer_group: "redpanda_connect_to_snowflake"
    tls: {enabled: true}
    sasl:
      - mechanism: SCRAM-SHA-256
        username: <Your Redpanda topic username>
        password: "${secrets.USER_PASSWORD}"
pipeline:
  # No transforms are needed
  processors: []
output:
  # Write data to Snowflake in batches to get bigger files
  snowflake_streaming:
    # Make sure to replace this with your account identifier
    account: "<Your Snowflake account identifier>"
    user: <Your Snowflake user account>
    role: ACCOUNTADMIN
    database: "ECOMMERCE"
    schema: "PUBLIC"
    table: "ORDERS"
    # Inject your private key and password
    private_key: "${secrets.SNOWFLAKE_KEY}"
    private_key_pass: "${secrets.SNOWFLAKE_KEY_PASSWORD}"
    # Automatically create tables and add new columns
    schema_evolution:
      enabled: true
    max_in_flight: 1
    batching:
      period: 30s
After pasting the configuration, click Create to complete the pipeline setup.
You'll be taken to the pipelines overview page. Your new pipeline should show up within a few moments with a "Running" status.
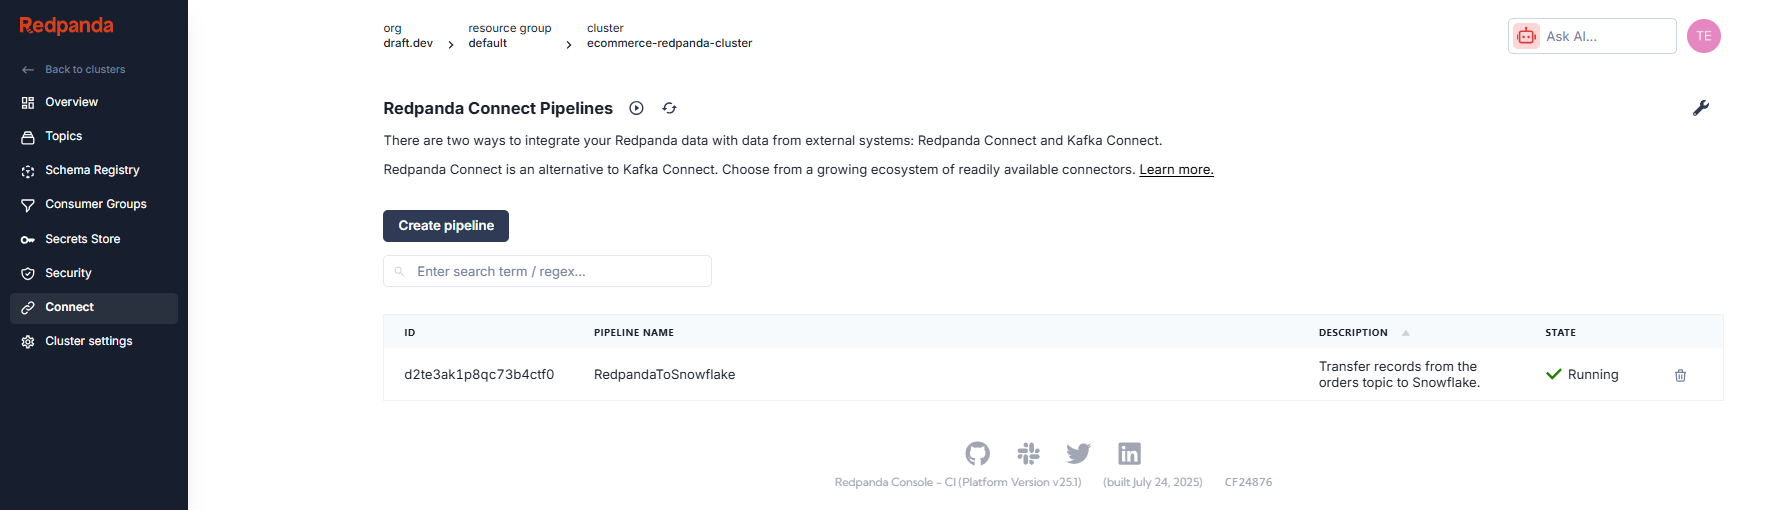
Keep this pipeline active; it's designed to continuously process messages from your Redpanda topic as they're published by the producer application.
For the last step, you need to configure and launch the producer application that publishes messages to your topic.
Make sure you're in your Python virtual environment, and then install the necessary dependency for Redpanda interaction with this command:
pip install kafka-python==2.0.3Create a new project directory on your machine and add a file called main.py. Add this Python code to generate random e-commerce order data and send it to the orders topic that your Redpanda Connect pipeline monitors:
from datetime import datetime, timedelta
import json
import random
import time
import uuid

from kafka import KafkaProducer


def generate_random_ecommerce_order():
    """
    Generates random e-commerce order data based on the specified schema.
    """
    order_id = f"ORD{uuid.uuid4().hex[:10].upper()}"  # Unique order ID
    user_id = f"USR{random.randint(1, 100):03d}"  # Random user ID (e.g., USR001 to USR100)

    # Sample products and their base prices
    products = {
        "PRD001": {"name": "Laptop", "price": 1200.00},
        "PRD002": {"name": "Mouse", "price": 25.00},
        "PRD003": {"name": "Keyboard", "price": 75.00},
        "PRD004": {"name": "Monitor", "price": 300.00},
        "PRD005": {"name": "Webcam", "price": 50.00},
        "PRD006": {"name": "Headphones", "price": 100.00},
        "PRD007": {"name": "USB Drive", "price": 15.00},
        "PRD008": {"name": "External HDD", "price": 80.00},
        "PRD009": {"name": "Printer", "price": 200.00},
        "PRD010": {"name": "Router", "price": 90.00},
    }

    product_id = random.choice(list(products.keys()))
    quantity = random.randint(1, 5)  # Random quantity between 1 and 5

    base_price = products[product_id]["price"]
    # Introduce some price variation (e.g., +/- 5% of the base price)
    order_total = round(base_price * quantity * (1 + random.uniform(-0.05, 0.05)), 2)

    # Generate a recent order time
    now = datetime.utcnow()
    # Orders can be from the last 7 days up to the current moment
    order_time = now - timedelta(days=random.randint(0, 7),
                                  hours=random.randint(0, 23),
                                  minutes=random.randint(0, 59),
                                  seconds=random.randint(0, 59))

    return {
        "order_id": order_id,
        "user_id": user_id,
        "product_id": product_id,
        "quantity": quantity,
        "order_total": order_total,
        "order_time": order_time.isoformat(timespec='seconds') + 'Z' # ISO 8601 with 'Z' for UTC
    }


def send_ecommerce_data():
    """
    Sends e-commerce order data to a Redpanda topic using a Kafka producer.
    """
    topic = "orders" # Changed topic name to be more descriptive
    producer = KafkaProducer(
        bootstrap_servers="<Your Redpanda Serverless broker hostname:port>",
        security_protocol="SASL_SSL",
        sasl_mechanism="SCRAM-SHA-256",
        sasl_plain_username="<Your Redpanda user>",
        sasl_plain_password="<Password of your Redpanda user>",
        key_serializer=str.encode,
        value_serializer=lambda v: json.dumps(v).encode("utf-8"),
    )

    print("Starting to send e-commerce order data...")
    while True:
        order_data = generate_random_ecommerce_order()
        message_key = order_data["order_id"] # Using order_id as key for better partitioning

        future = producer.send(topic, key=message_key, value=order_data)
        try:
            result = future.get(timeout=15)
            print(
                f"Message sent | Order ID: {order_data['order_id']} | User ID: {order_data['user_id']} | Product: {order_data['product_id']} | Total: {order_data['order_total']} | Time: {order_data['order_time']} | Partition: {result.partition}, Offset: {result.offset}"
            )
        except Exception as e:
            print(f"Failed to send message: {e}")

        time.sleep(random.uniform(0.5, 2.0)) # Vary the sleep time to simulate irregular order flow


Call the function to send the e-commerce order data
send_ecommerce_data()
Make sure to update these variables in the send_ecommerce_data method to match your Redpanda Serverless cluster settings:
bootstrap_servers="<Your Redpanda Serverless broker hostname:port>",
sasl_plain_username="<Your Redpanda user>",
sasl_plain_password="<Password of your Redpanda user>",
Save the file. Then, in a terminal, run py main.py to execute the producer application.
You should see the following output, indicating that the orders are being published to the Redpanda topic:
Starting to send e-commerce order data...
Message sent | Order ID: ORDDCEA924629 | User ID: USR050 | Product: PRD007 | Total: 29.06 | Time: 2025-09-03T03:03:20Z | Partition: 0, Offset: 27
Message sent | Order ID: ORDB6F5A62216 | User ID: USR031 | Product: PRD001 | Total: 4943.25 | Time: 2025-08-28T20:05:02Z | Partition: 0, Offset: 28
Message sent | Order ID: ORD27B12216B3 | User ID: USR089 | Product: PRD010 | Total: 88.81 | Time: 2025-08-31T06:35:33Z | Partition: 0, Offset: 29
Message sent | Order ID: ORD8DADC4E653 | User ID: USR025 | Product: PRD005 | Total: 98.94 | Time: 2025-08-30T06:45:39Z | Partition: 0, Offset: 30
Message sent | Order ID: ORD29639DA4ED | User ID: USR046 | Product: PRD001 | Total: 4704.57 | Time: 2025-09-04T05:34:59Z | Partition: 0, Offset: 31
Message sent | Order ID: ORDA1D35A829F | User ID: USR096 | Product: PRD004 | Total: 620.44 | Time: 2025-08-31T00:08:59Z | Partition: 0, Offset: 32
Message sent | Order ID: ORD519C8FB822 | User ID: USR042 | Product: PRD009 | Total: 191.16 | Time: 2025-09-02T02:55:53Z | Partition: 0, Offset: 33
Message sent | Order ID: ORD64497FE89E | User ID: USR051 | Product: PRD004 | Total: 1187.38 | Time: 2025-08-31T04:06:13Z | Partition: 0, Offset: 34
Message sent | Order ID: ORD9AEB56EFC1 | User ID: USR080 | Product: PRD007 | Total: 29.09 | Time: 2025-09-01T17:47:57Z | Partition: 0, Offset: 35
Message sent | Order ID: ORD2F77C50749 | User ID: USR017 | Product: PRD001 | Total: 4708.48 | Time: 2025-08-30T22:41:30Z | Partition: 0, Offset: 36
Message sent | Order ID: ORDA2EC335103 | User ID: USR095 | Product: PRD005 | Total: 258.86 | Time: 2025-08-31T19:16:51Z | Partition: 0, Offset: 37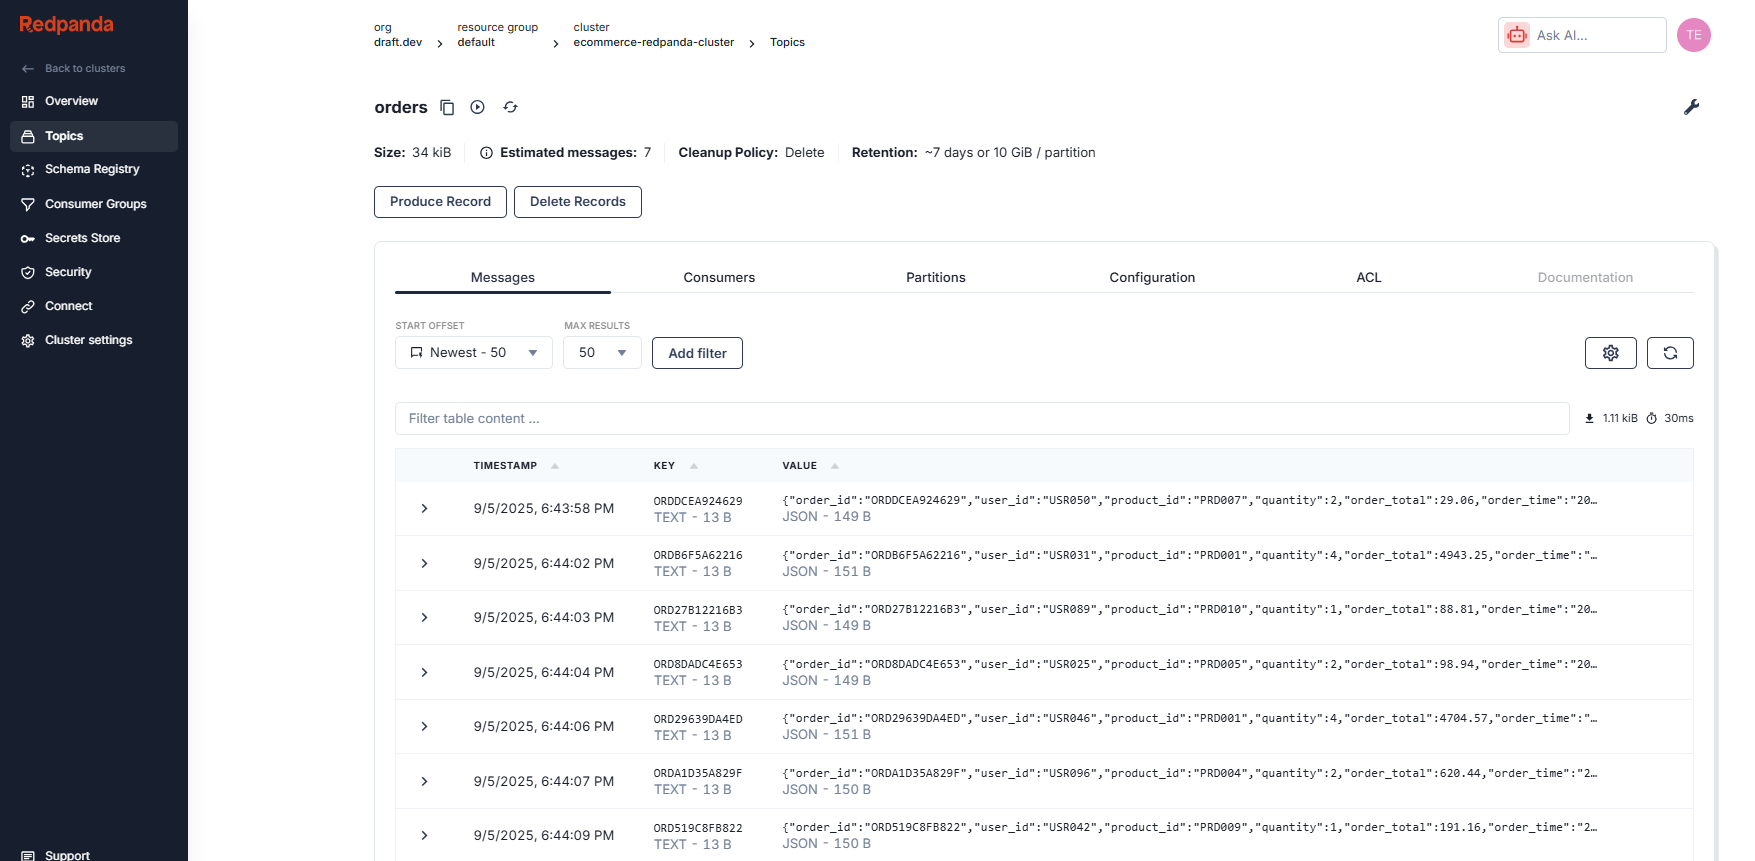
Message sent | Order ID: ORDD6D33B28A1 | User ID: USR045 | Product: PRD007 | Total: 29.67 | Time: 2025-09-04T17:11:59Z | Partition: 0, Offset: 38Go back to your Redpanda Serverless account in your browser and open the Topics screen. If you select the orders topic, you should see a continuous flow of messages with order data populating the topic:
To see if data is streaming into your Snowflake table, go to the Snowflake SQL worksheet in your browser and run this query:
select * from orders;You should see new rows showing up as your producer app generates data and the pipeline streams it into Snowflake.

That's it! Your data is now streaming into Snowflake. Look at you go.
In this tutorial, you set up a live data pipeline streaming e-commerce order data from Redpanda into Snowflake. This gives you real-time insights for tracking sales trends, managing inventory, and detecting fraud.
Next, you could try adding data transformations in the pipeline or connecting additional data sources like customer activity logs. The full source code is available in this GitHub repository.
To play more with Redpanda, get hands-on and give it a free spin. Join the Redpanda Community on Slack if you have questions!
Now deployable on Amazon Web Services (AWS)

Your analytics stack can only see data that made it through the pipeline. That's only half the picture.

Solving the performance bottleneck for high-latency storage
Subscribe to our VIP (very important panda) mailing list to pounce on the latest blogs, surprise announcements, and community events!
Opt out anytime.